How to Divide a Studio Apartment Into Zones: 40 Smart Ideas
Introduction
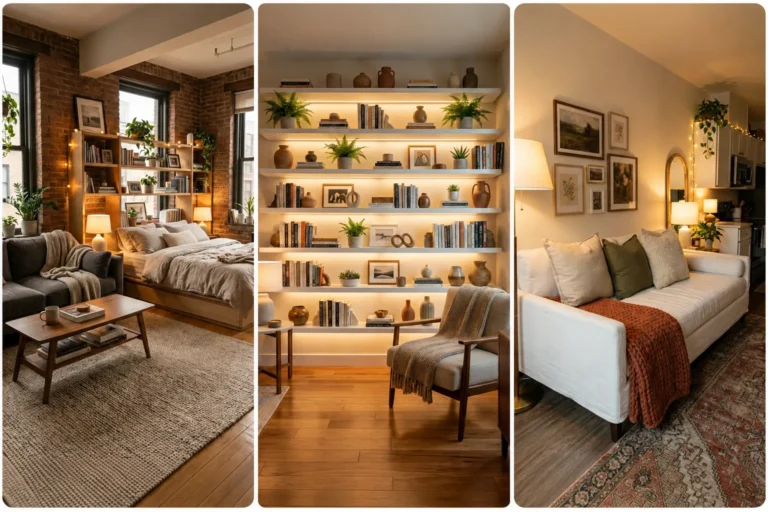
A studio apartment combines your living room, bedroom, and sometimes your office into one open space, which can feel overwhelming without clear boundaries. The good news is you do not need to build a wall to create separation. Smart furniture placement, lighting, and a few visual tricks can divide a studio into distinct zones that each feel like their own room.
These forty ideas cover everything from rugs and lighting to furniture angles and color choices. Whether you are working with a tiny city studio or a slightly larger open-plan layout, these strategies will help your space feel organized and intentional.
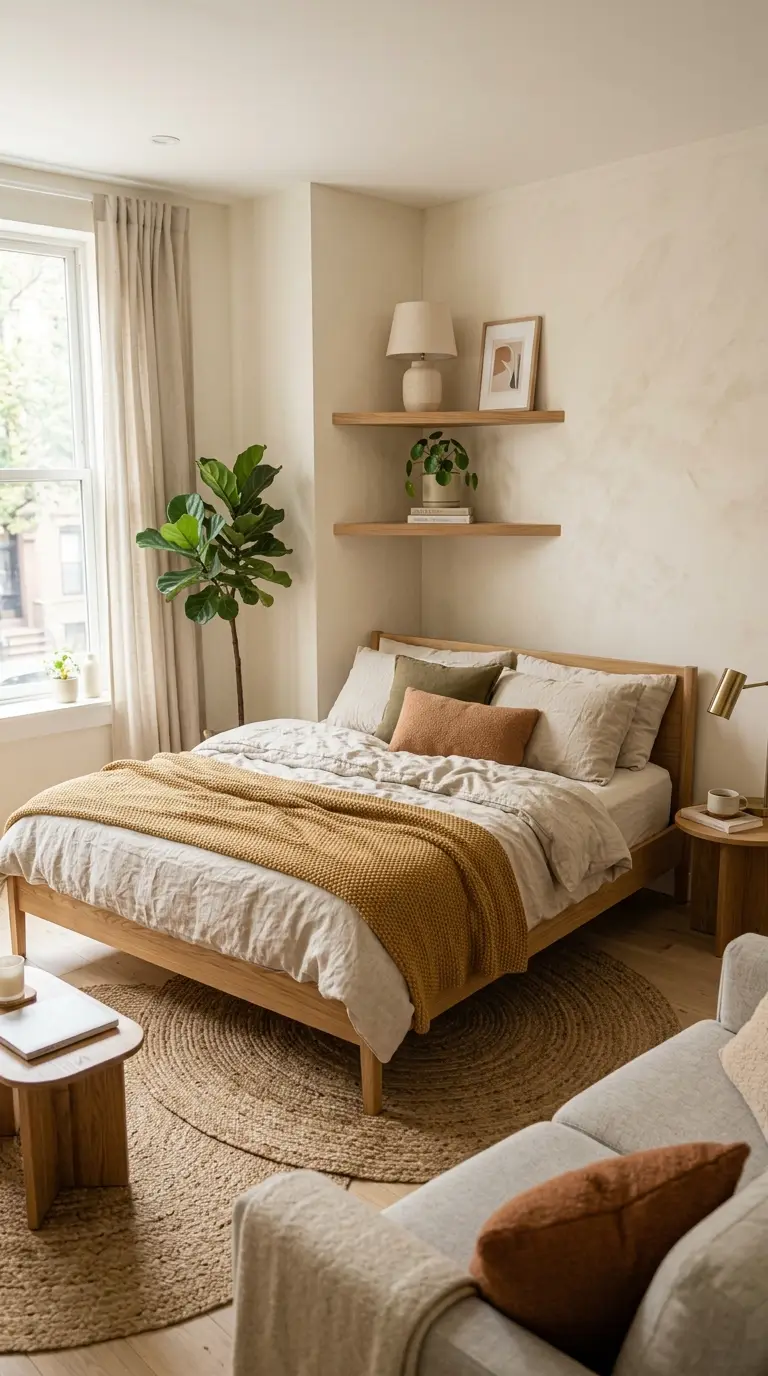
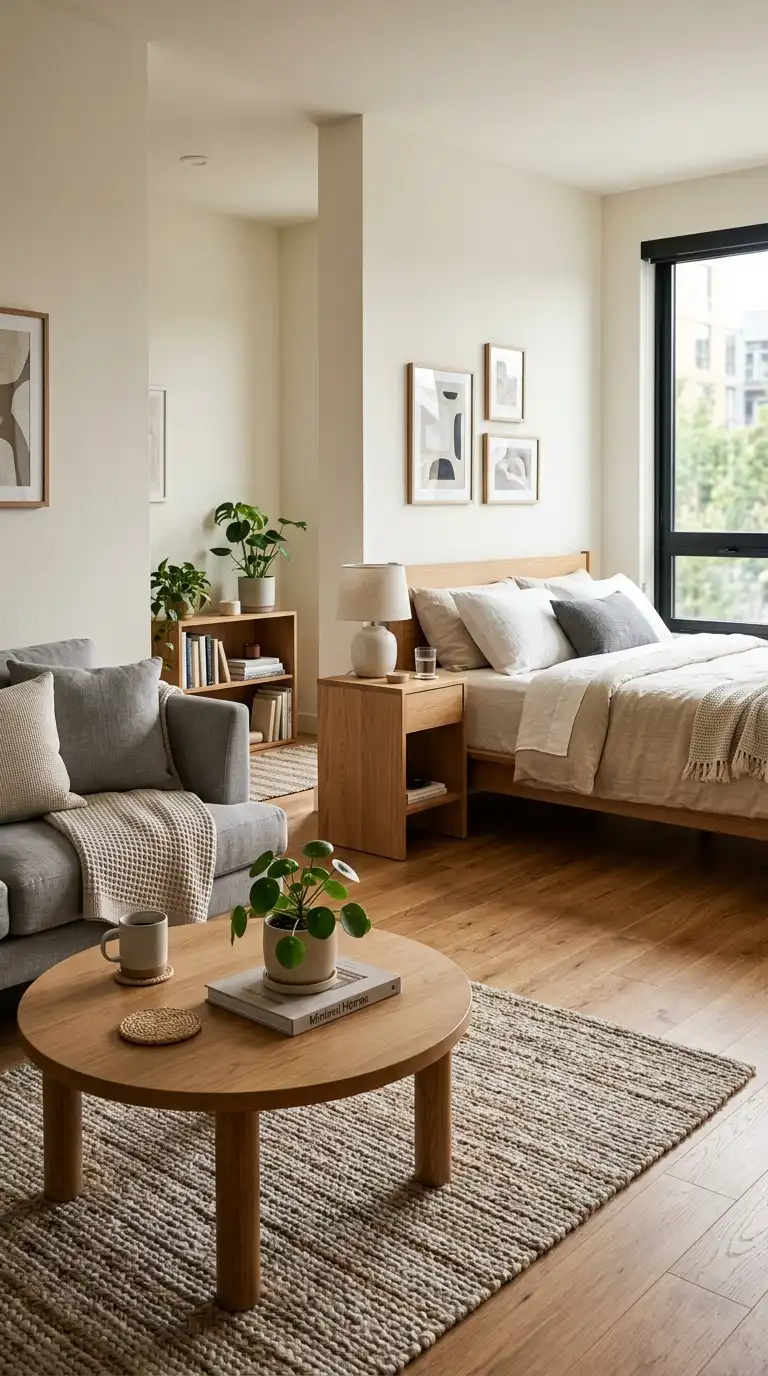
1. Use an Area Rug to Define the Living Zone
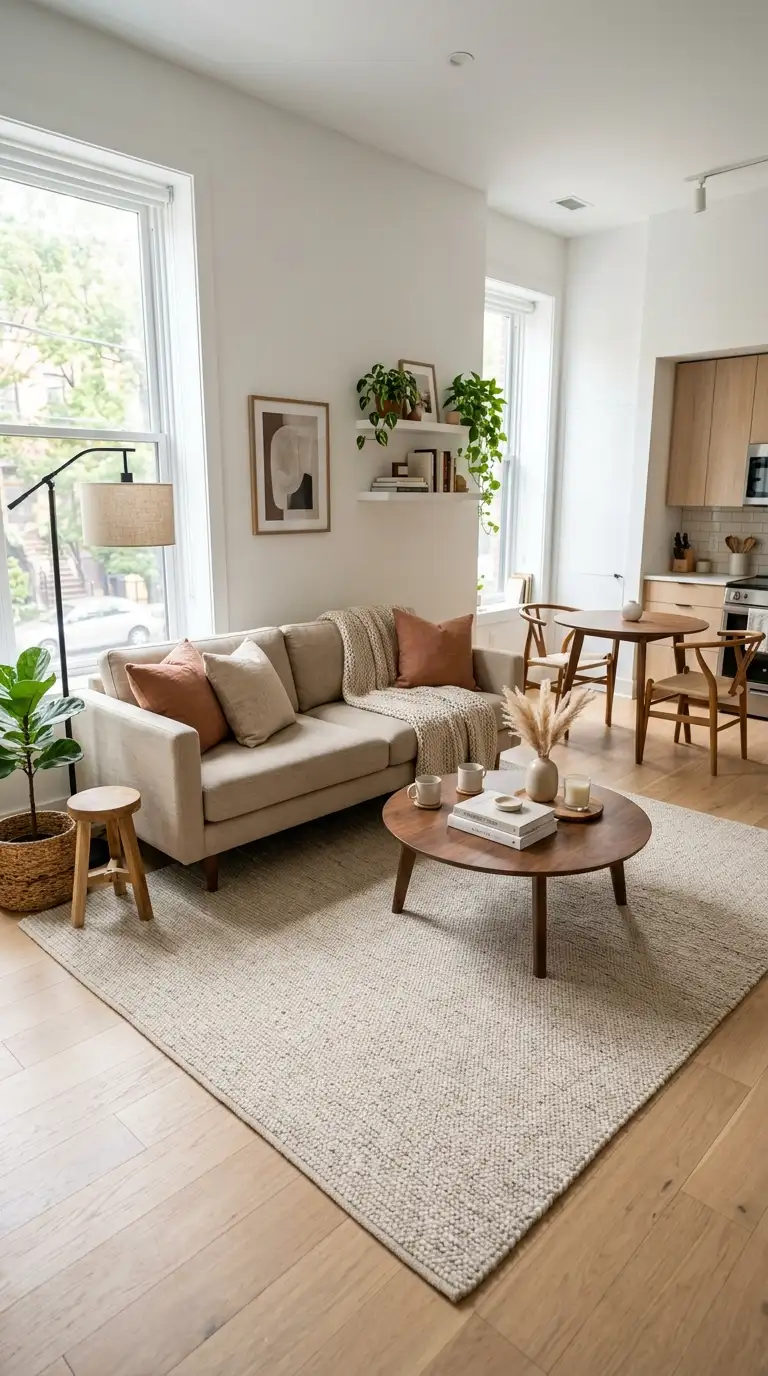
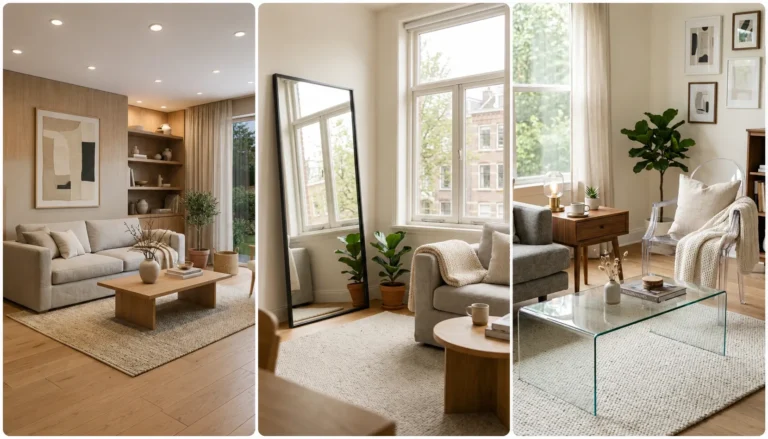
A rug placed under your sofa and coffee table visually separates the living area from the rest of the studio without any construction. The boundary created by the rug’s edges tells the eye where one zone ends and another begins. This is one of the simplest and most affordable zoning tricks available.
Choose a rug large enough to fit the front legs of your seating, since a rug that is too small can look disconnected from the furniture. A slightly different color or texture from your sleeping area rug reinforces the separation further. It is a foundational step for almost any studio layout.
2. Use a Second Rug to Define the Sleeping Zone
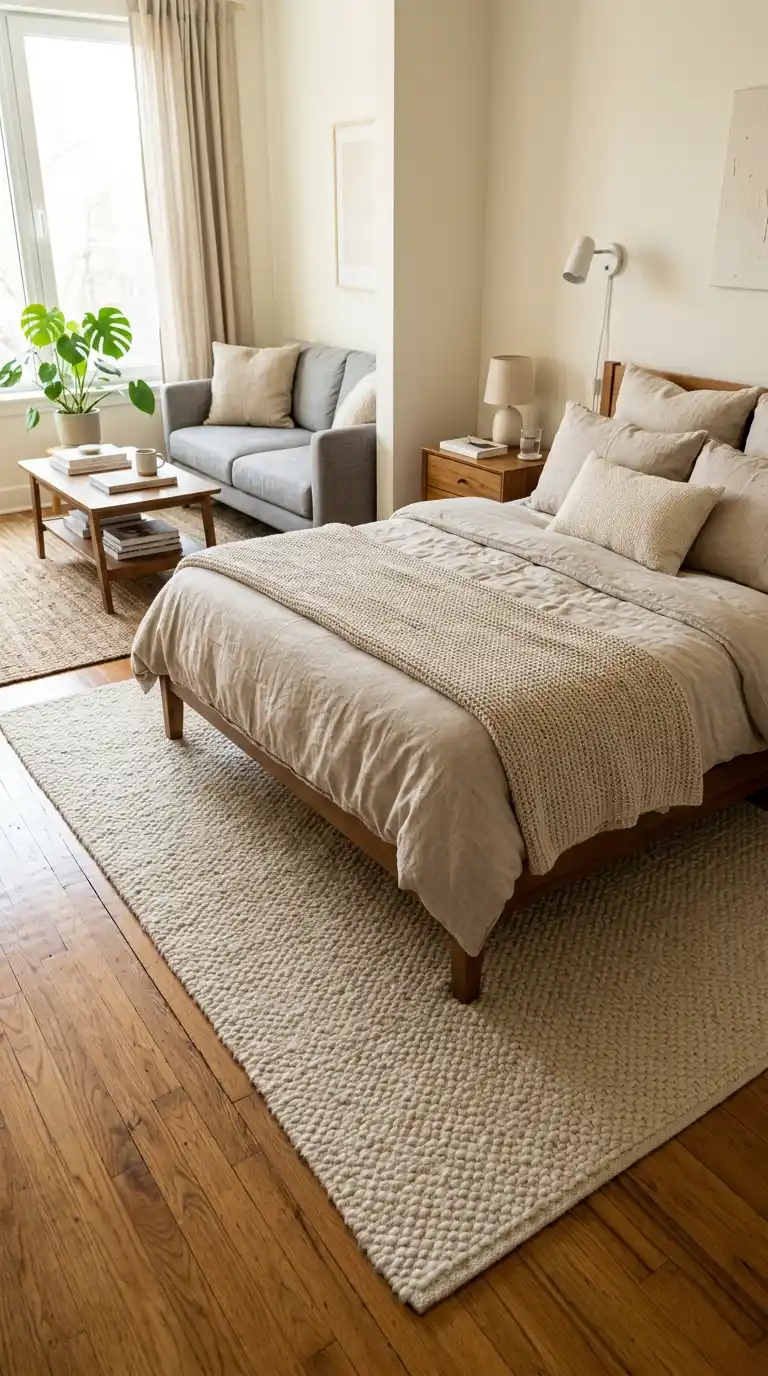
Just as a rug anchors the living area, a separate rug under your bed creates a clear boundary for the sleeping zone. The contrast between two rugs, even if they share a similar color family, signals a shift in function as you move through the space. This trick works especially well in studios with hard flooring throughout.
Pick a softer, plush texture for the bedroom rug since this area is where bare feet land first thing in the morning. Keeping the two rugs in a complementary palette prevents the space from feeling chopped up. It is a small change that makes a big difference in how the studio reads.
Pro Tip: When using two rugs to define zones, leave a small gap of bare flooring between them rather than placing them edge to edge. This gap acts as a natural transition point and keeps the zones feeling distinct.
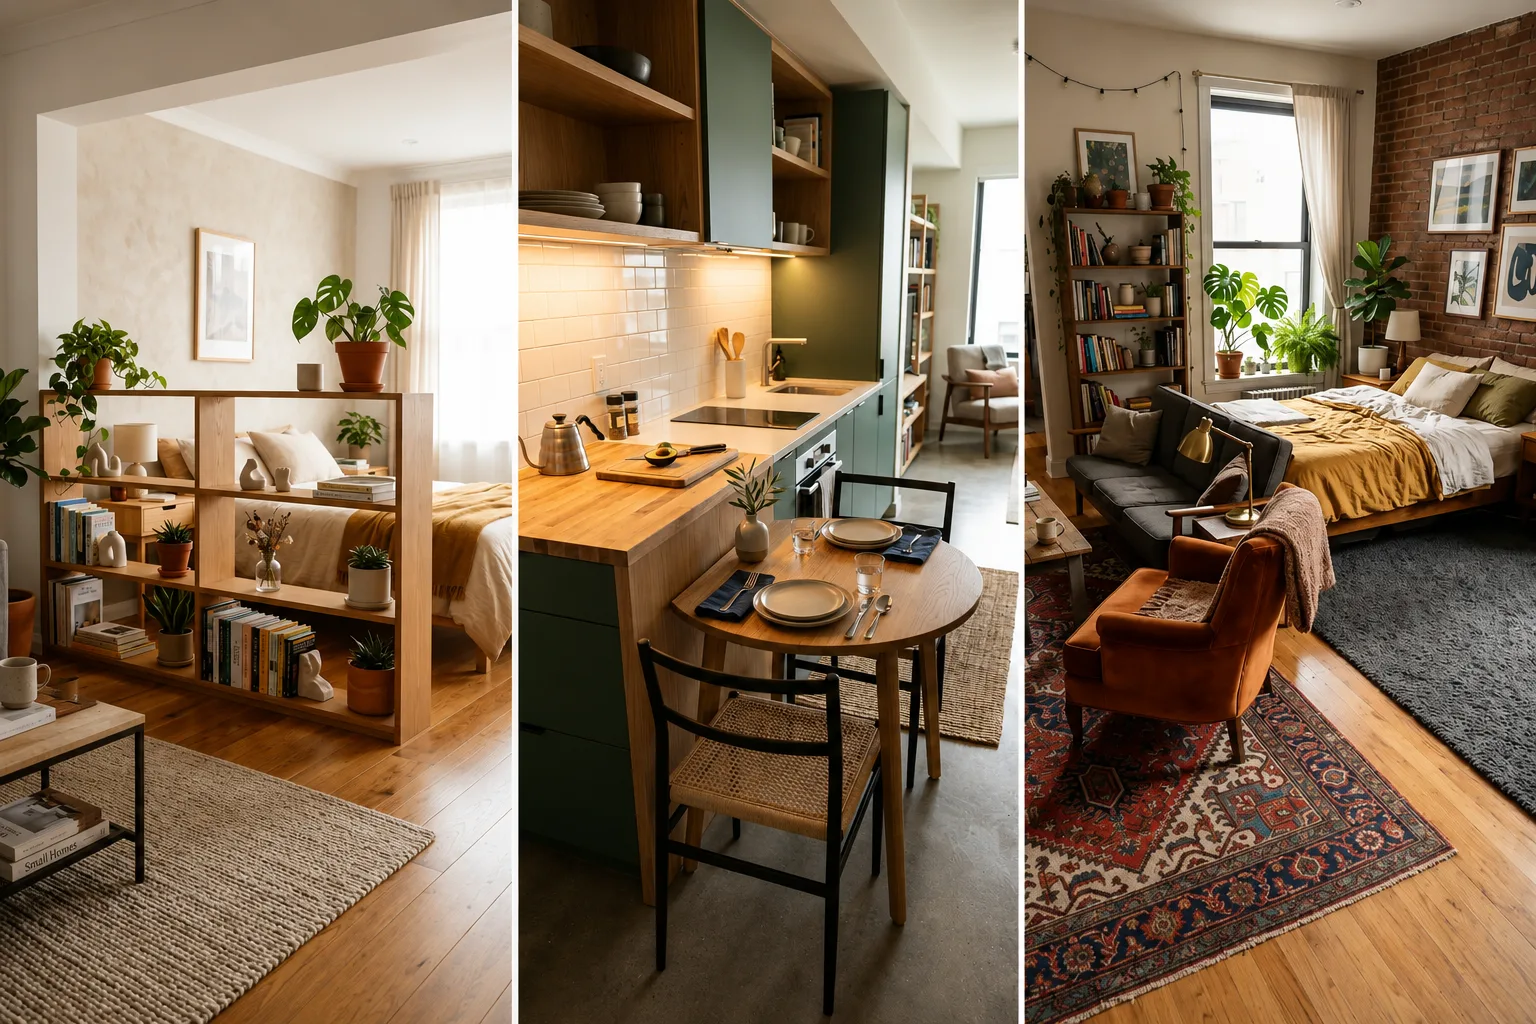
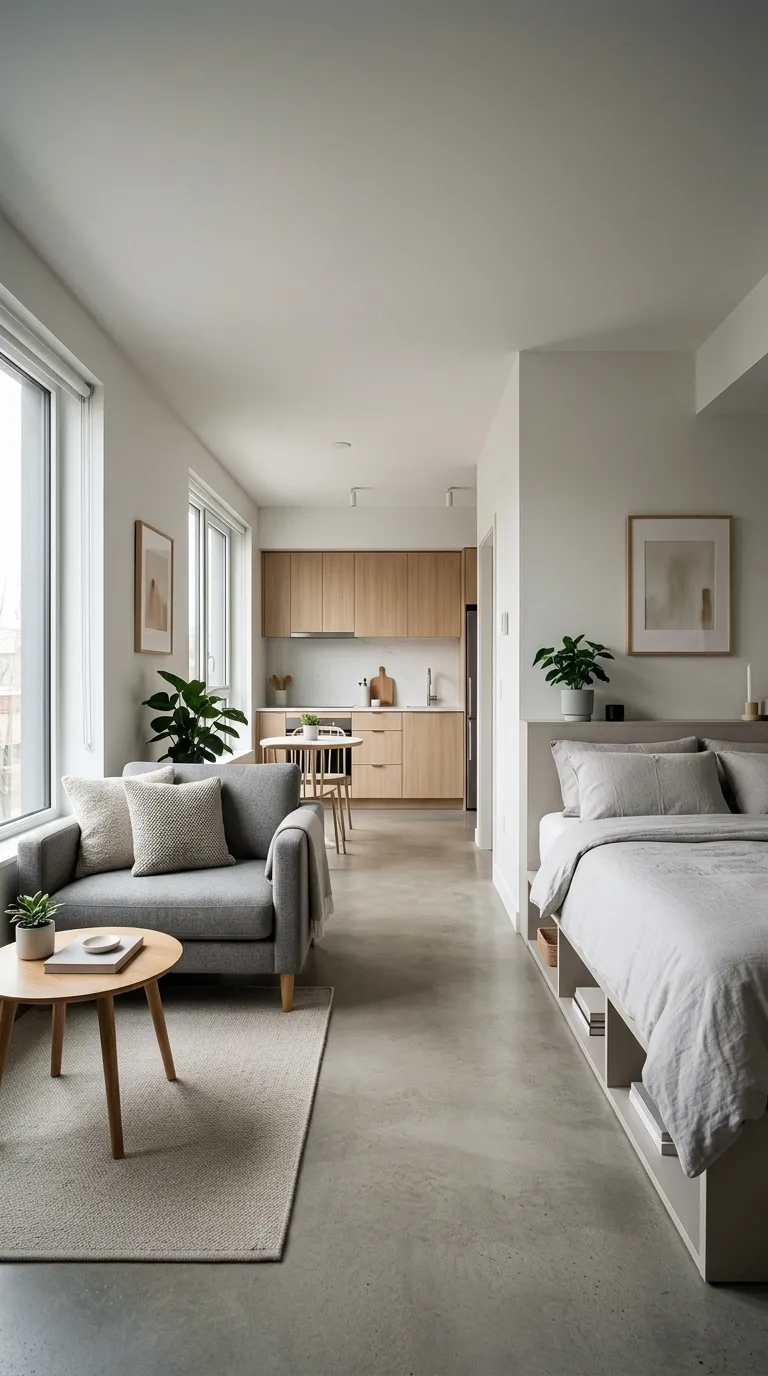
3. Position the Bed Behind the Sofa
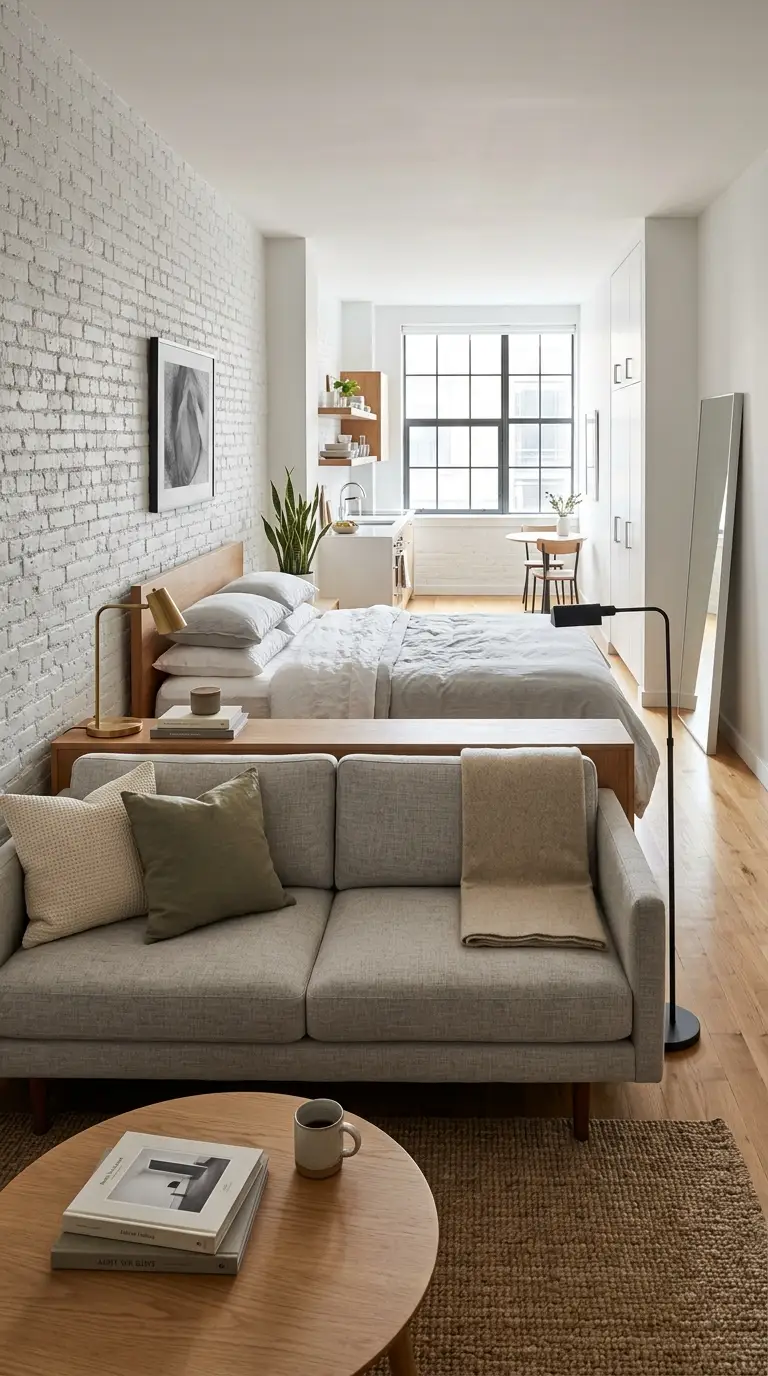
Placing your bed directly behind your sofa, with the sofa back facing the mattress, creates an instant sense of separation using furniture you already own. The sofa acts as a low wall, blocking the direct line of sight to the bed from the main living area. This layout works particularly well in narrow or rectangular studios.
Leave enough space between the sofa back and the bed for the layout to feel intentional rather than cramped. A slim console table behind the sofa adds a useful surface while reinforcing the boundary. It is one of the most effective layout tricks for studios with limited furniture options.
4. Use a Console Table as a Visual Anchor
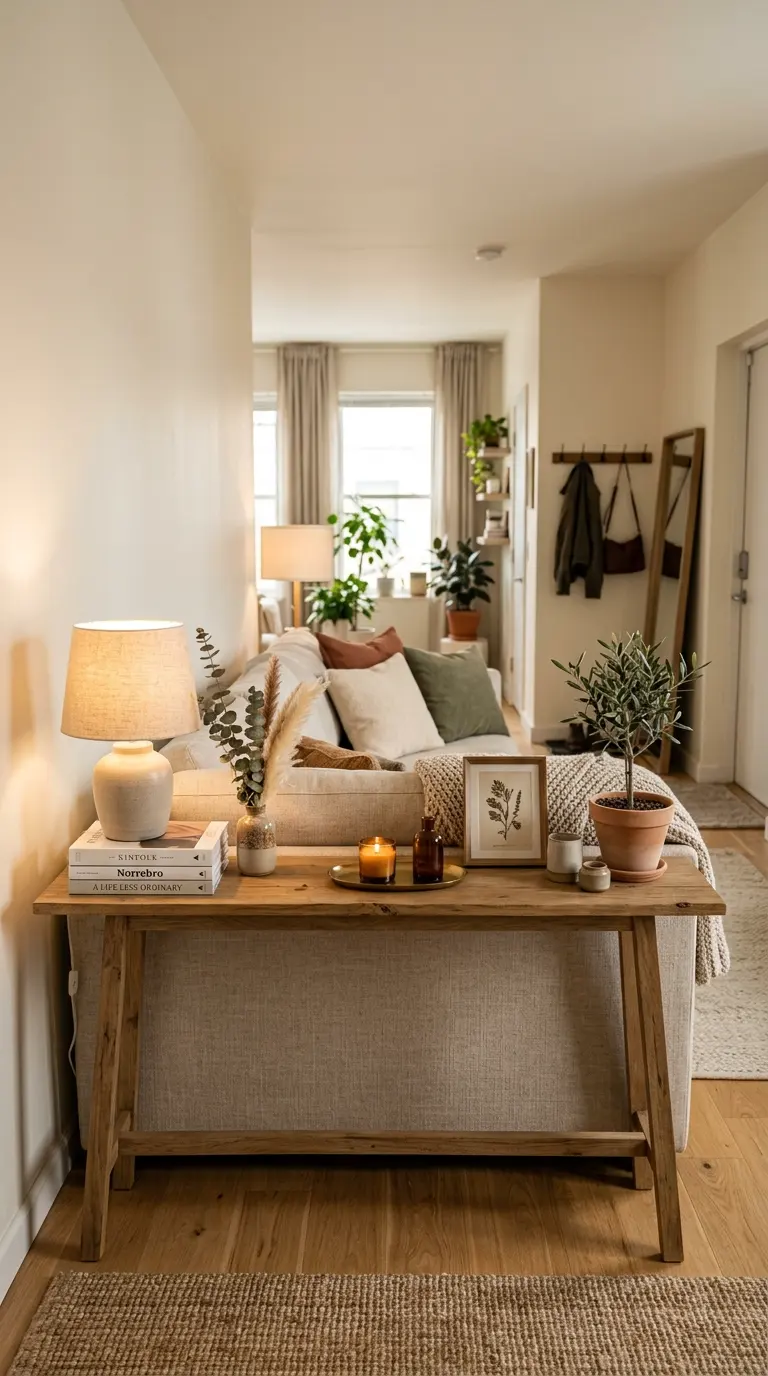
A narrow console table placed at the edge of a zone acts as a clear marker without taking up much floor space. It can sit behind a sofa, beside a bed, or near an entryway, signaling where one area transitions into the next. This piece also adds useful surface space for lamps, decor, or daily essentials.
Choose a console with a slim profile so it does not block walking paths between zones. Adding a lamp or a small stack of books on top reinforces its role as a boundary marker. It is a flexible, functional piece that works in almost any studio layout.
5. Angle the Bed Diagonally in a Corner
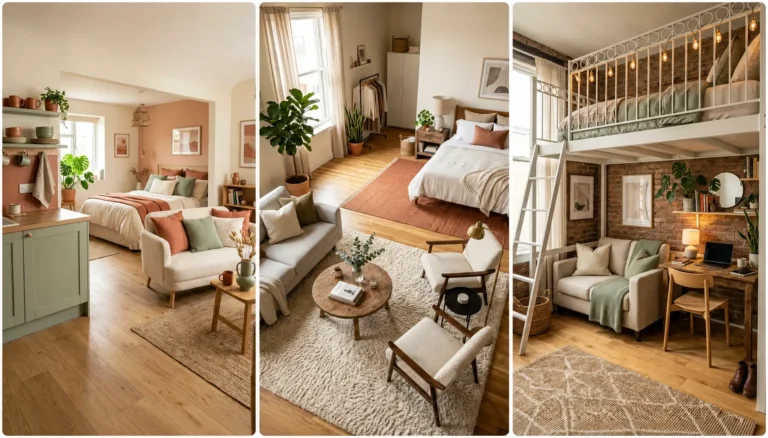
Angling your bed into a corner, rather than pushing it flush against a wall, creates a distinct nook that feels separate from the rest of the room. The diagonal placement uses the corner’s natural boundaries to define the sleeping area without any additional furniture. This trick works especially well in square or oddly shaped studios.
Leave enough space around the angled bed for nightstands or a small reading chair if your layout allows. This placement also tends to make the room feel larger, since it opens up more usable floor space along the walls. It is an unconventional but effective way to zone a tight space.
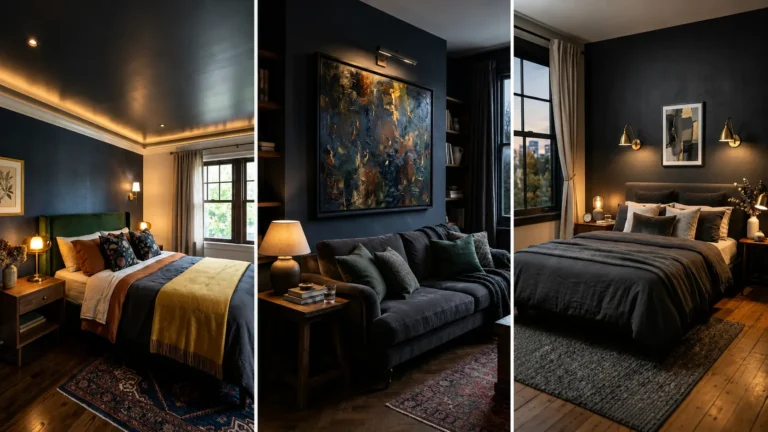
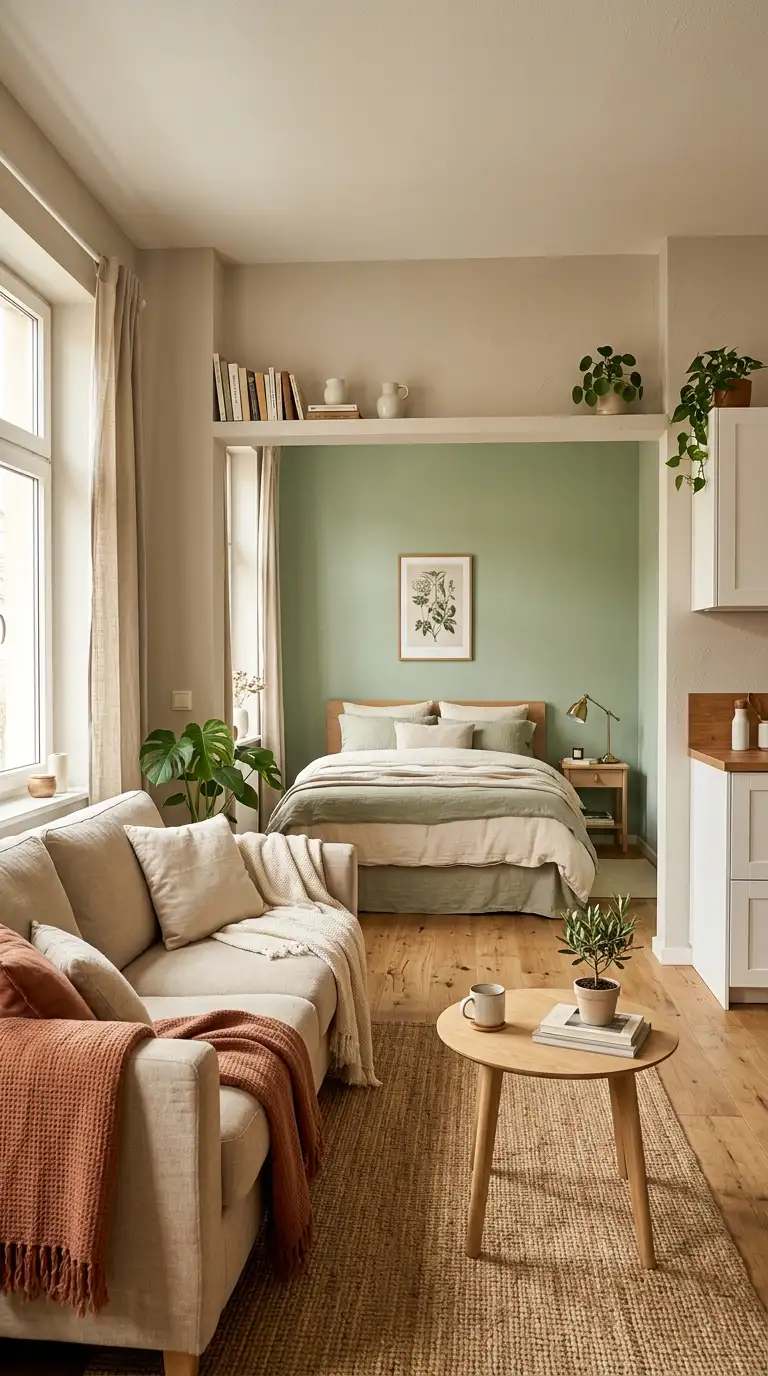
6. Use Different Paint Colors for Each Zone
Painting one wall or one section of the studio in a different color from the rest creates a subtle but clear signal that the zones serve different purposes. This works well when the color change aligns with a furniture grouping, like the sleeping area or a reading nook. The shift in color does a lot of visual work without any structural change.
Choose colors from the same family for a cohesive look, rather than colors that clash or compete. A muted accent wall tends to read as more intentional than a bold, jarring contrast. It is a paint-only solution that requires no new furniture at all.
Warning: Avoid using too many different paint colors throughout a small studio, since this can make the space feel chopped up rather than thoughtfully zoned. Stick to one or two accent changes at most.
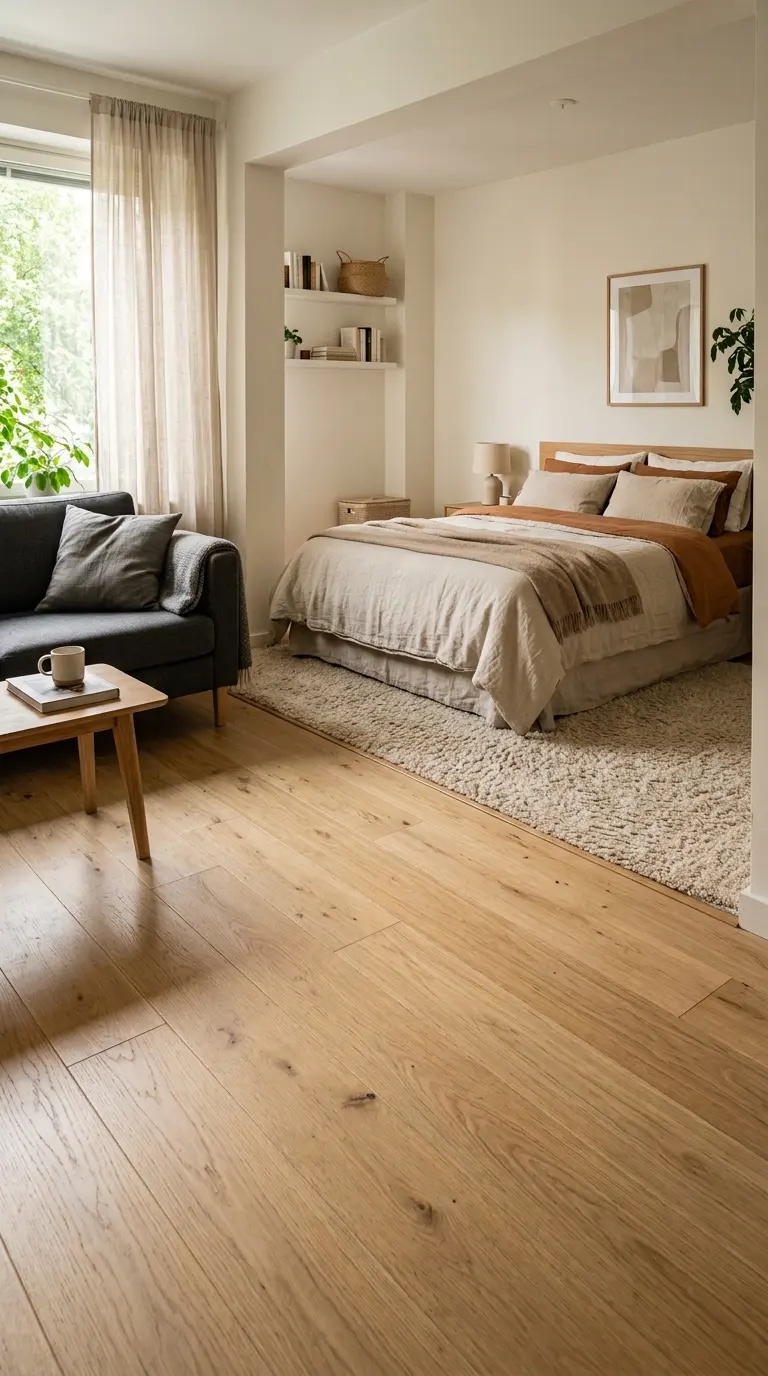
7. Switch Flooring Materials Between Zones

If your studio allows for it, switching flooring materials between zones, such as wood in the living area and a soft rug or different finish in the bedroom, creates a built-in boundary. This works especially well in renovated or custom-built studios where flooring changes are part of the original design. Even a peel-and-stick flooring update can mimic this effect temporarily.
Choose materials that complement each other in tone, even if the texture differs. A clear transition strip helps the flooring change feel finished rather than accidental. It is a more permanent solution, but one that creates a lasting sense of separation.
8. Use a Daybed Instead of a Traditional Bed
A daybed functions as both a sofa and a bed, which allows the sleeping zone to double as a secondary living area during the day. This flexibility makes the zoning feel less rigid, since the same furniture serves multiple purposes depending on the time of day. It works particularly well in very small studios where every piece needs to multitask.
Choose a daybed with a back and armrests so it reads as seating rather than just a mattress on a frame. Style it with pillows that match your living room’s palette to tie the two zones together visually. It is a smart hybrid solution for studios with limited square footage.
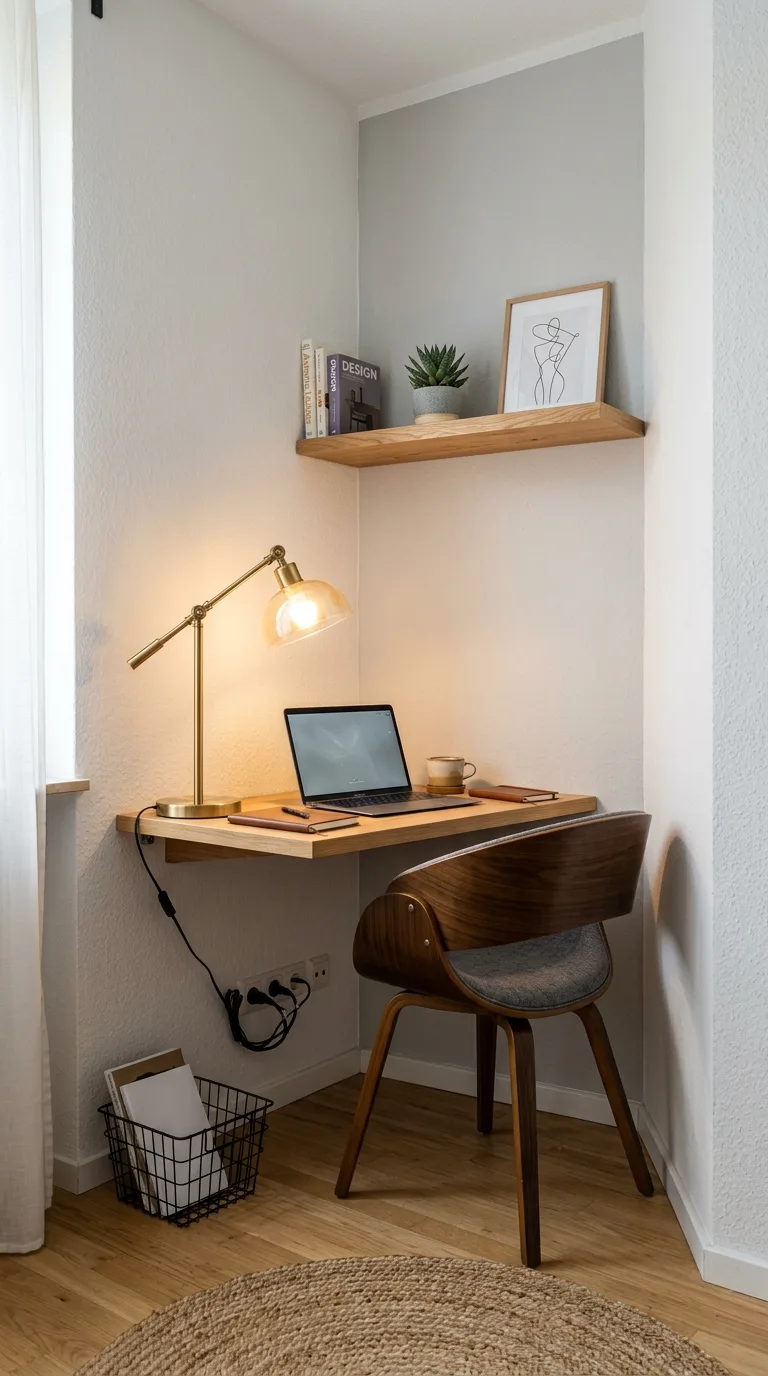
9. Define a Workspace With a Single Desk Lamp
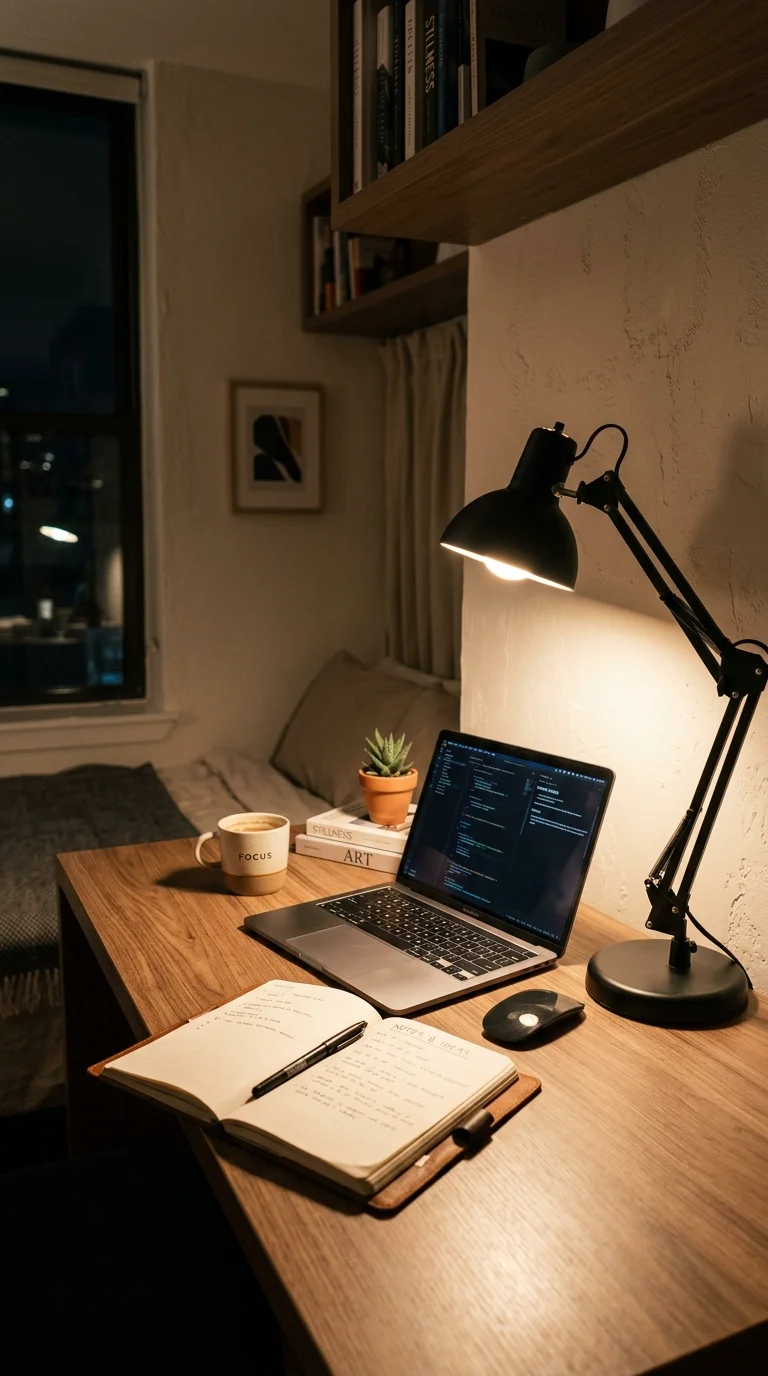
A dedicated desk lamp, rather than relying on the room’s main overhead light, signals that a specific corner is meant for focused work. This small lighting choice helps your brain shift into work mode when you sit down, even without any physical divider. It is one of the most affordable ways to create a sense of zoning.
Choose a lamp with adjustable brightness so you can dim it when the workspace is not in use. Pairing the lamp with a small desk or table reinforces the zone even further. It is a detail that makes a real difference in how distinct a workspace feels.
10. Use Ceiling Beams or Trim to Mark a Boundary

If your studio has exposed beams or you add decorative trim to the ceiling, this architectural detail can mark where one zone transitions into another without touching the floor plan at all. The eye naturally follows lines on the ceiling, which helps reinforce a sense of separation overhead. This works especially well in studios with higher ceilings.
Choose a trim color that contrasts subtly with the ceiling for the most noticeable effect. This detail pairs well with a rug or paint change directly beneath it for a layered zoning effect. It is a more design-forward trick that adds architectural interest.
| Style Name | Best For | Maintenance Level | Footprint Saved |
|---|---|---|---|
| Area Rug Zoning | Living and sleeping areas | Low | None |
| Console Table Anchor | Entryways, transitions | Low | Small |
| Daybed Hybrid | Multi-use sleeping zones | Low | Medium |
| Desk Lamp Workspace | Home office corners | Low | None |
| Pendant Light Zoning | Dining or kitchen areas | Medium | None |
11. Hang Pendant Lights Over Specific Zones
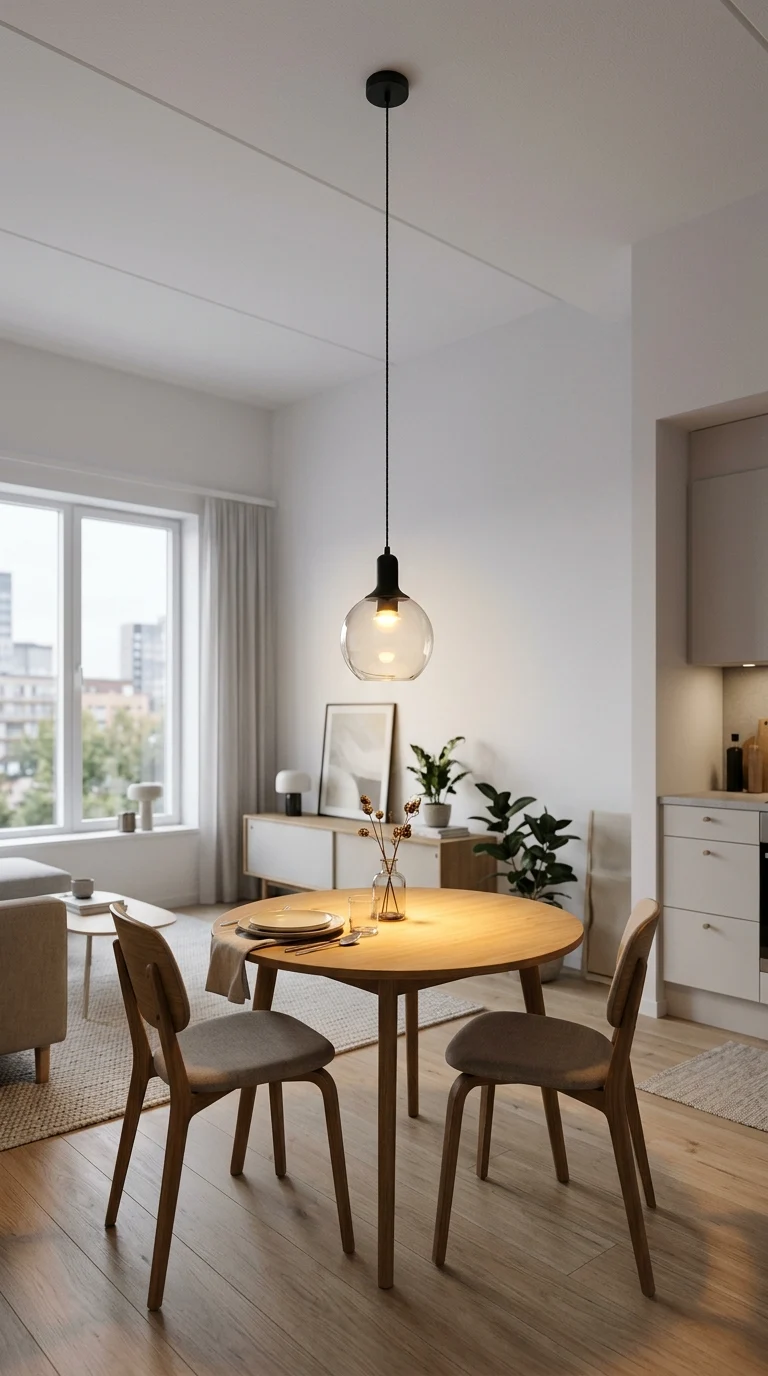
A pendant light hung over a dining table or reading chair draws the eye downward and signals that this specific spot serves a distinct purpose. Unlike overhead recessed lighting that washes the whole room evenly, a pendant creates a pool of light tied to one area. This trick works especially well in studios with open kitchen and dining combinations.
Choose a pendant height that sits low enough to feel intentional but high enough to avoid blocking sightlines across the room. A simple, understated fixture tends to blend better into a small space than an oversized statement piece. It is a lighting trick that doubles as decor.
12. Use a Tall Headboard as a Soft Barrier
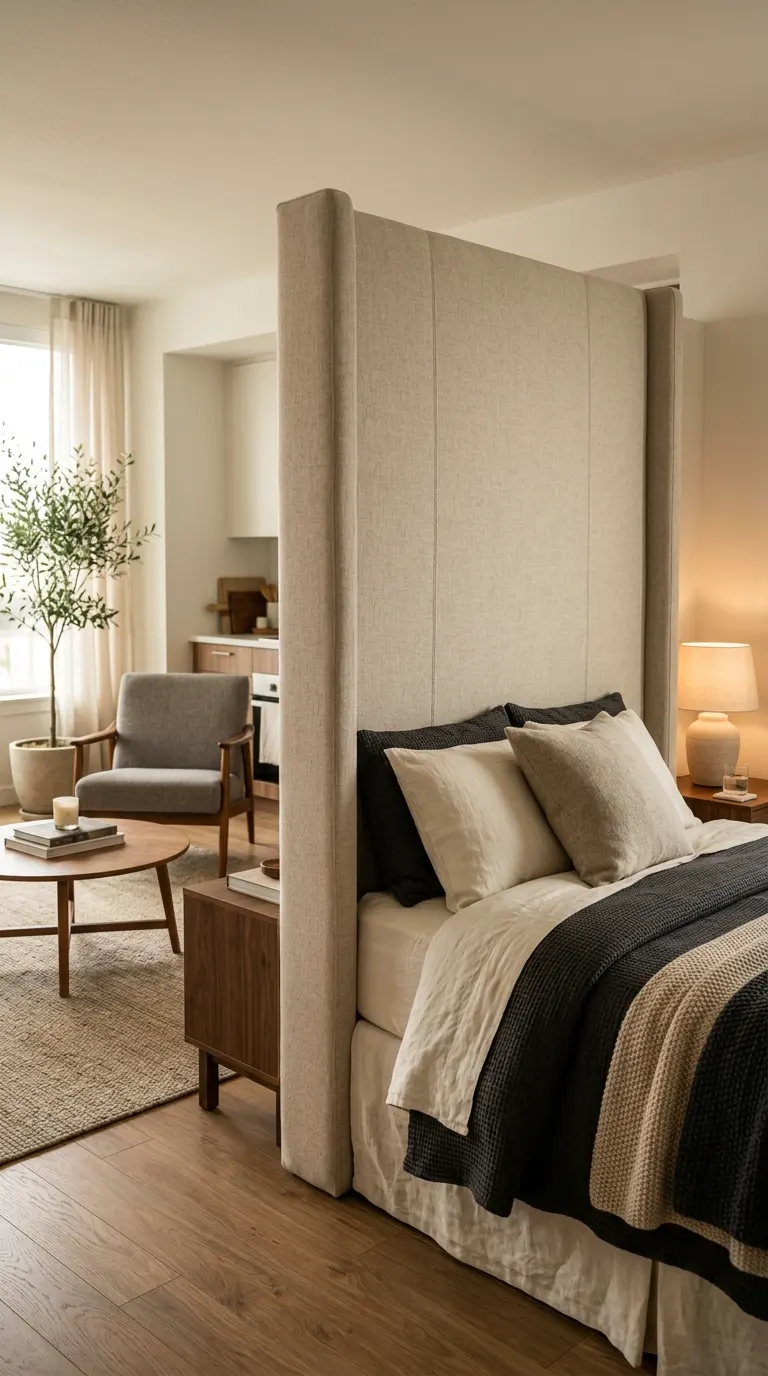
A tall upholstered headboard does more than support pillows, it also acts as a soft visual barrier between the bed and the rest of the studio. Positioned correctly, it can partially block the sightline from the living area into the sleeping zone. This works well when the bed sits along a wall that faces the main room.
Choose a headboard with enough height to create a real visual break, rather than a low, decorative one. Pairing it with a console table on the opposite side reinforces the boundary even further. It is a furniture-based solution that requires no extra floor space.
13. Place the Dining Table Near the Kitchen Edge
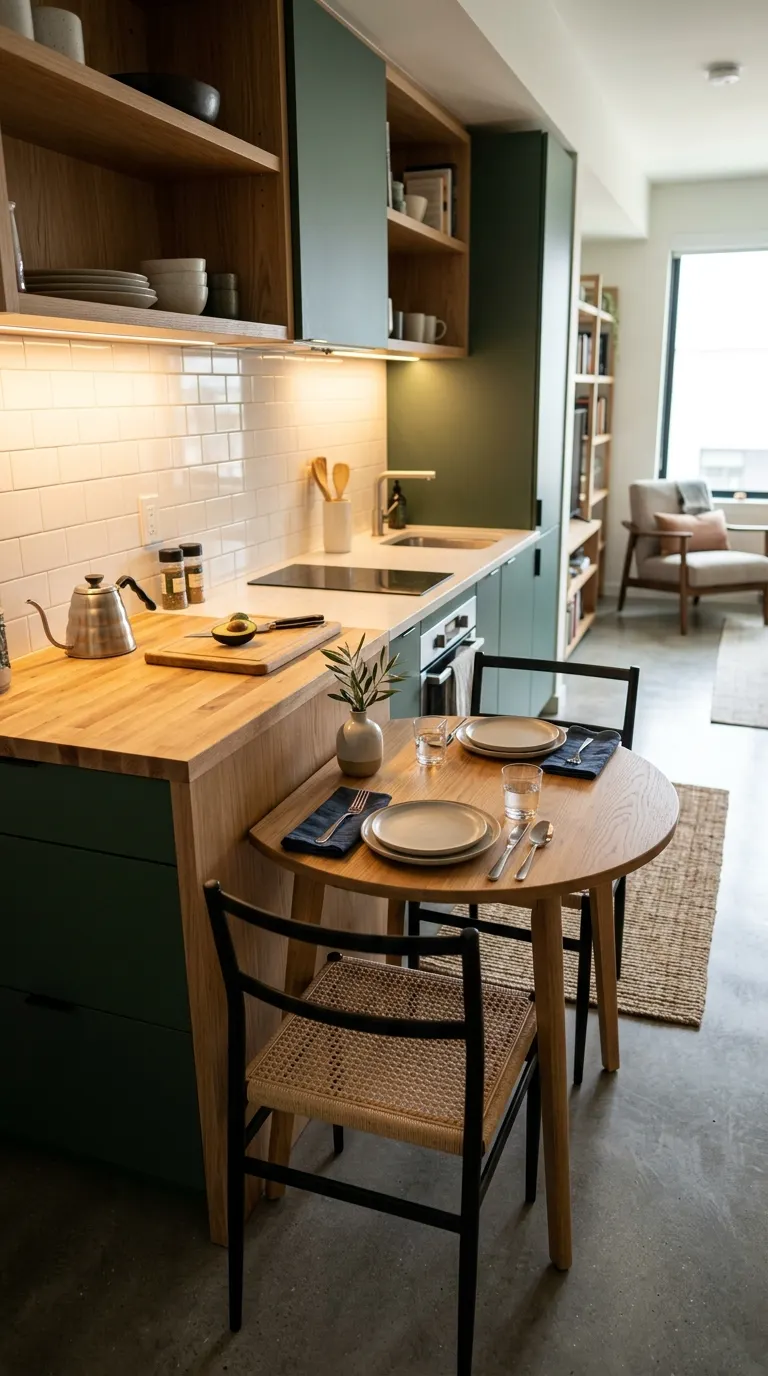
Positioning your dining table close to the kitchen, rather than floating it in the middle of the room, keeps the eating zone visually tied to the cooking area instead of bleeding into the living space. This placement creates a natural flow between two functions that already relate to each other. It works well in studios with a galley-style kitchen layout.
Choose a table size proportional to the available space near the kitchen edge, since an oversized table can block walking paths. A pendant light or rug underneath the table reinforces the zone further. It is a layout choice that respects how the space is actually used.
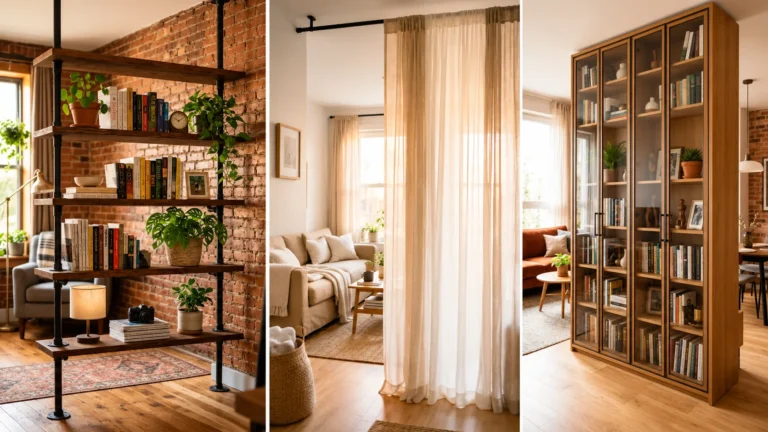
14. Use Vertical Storage to Mark a Transition Point
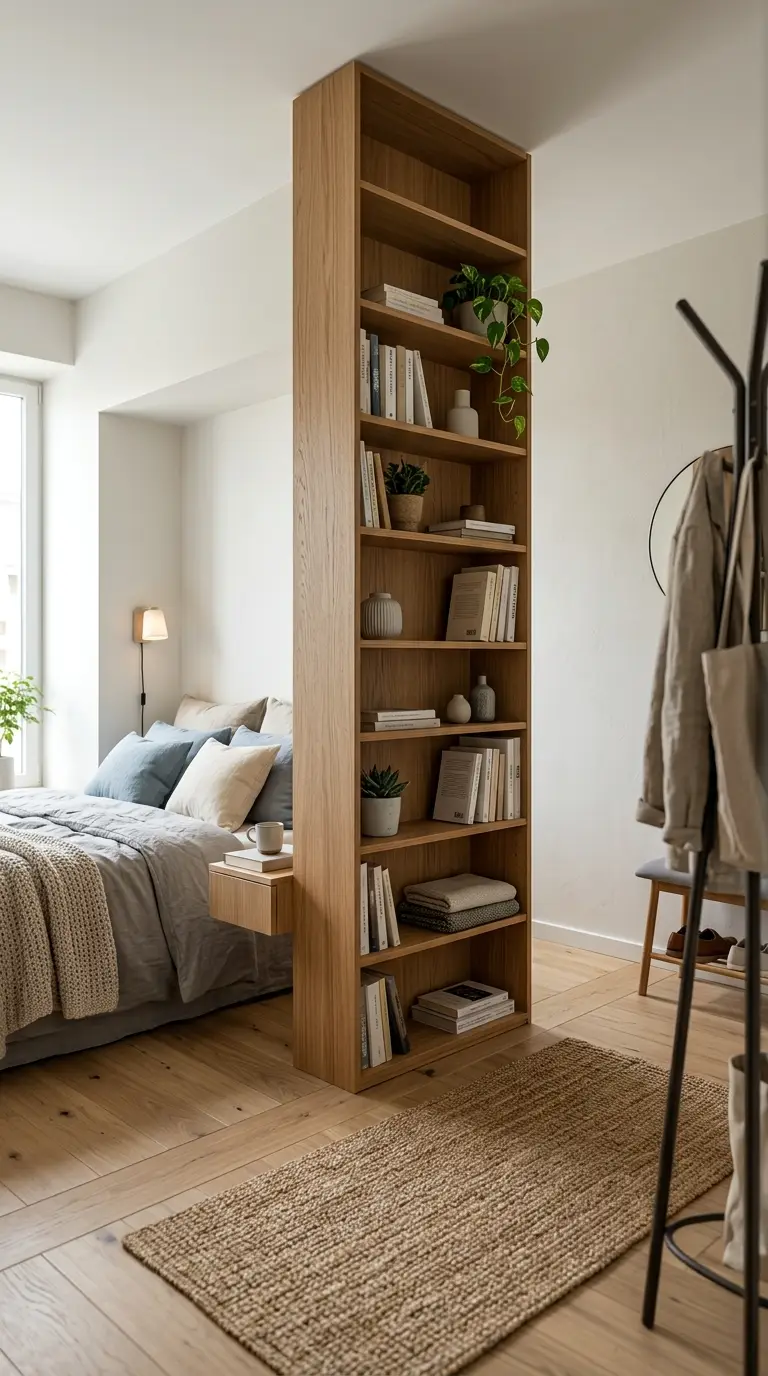
A tall, narrow storage unit, like a slim bookshelf or wardrobe, placed at the edge of a zone creates a visual stopping point as you move through the studio. Unlike a low piece of furniture, the height draws the eye upward and reinforces the sense of a boundary. This works especially well between a sleeping area and a closet or entry zone.
Choose a unit that fits the available space without blocking natural light from a nearby window. Style the shelves to face both zones if the piece is open on multiple sides. It is a storage solution that does double duty as a zoning tool.
Important: When using furniture to create zones in a studio, always check your local fire code and emergency exit requirements before placing tall or bulky pieces near doors and windows. Safety should never be compromised for the sake of a layout trick.
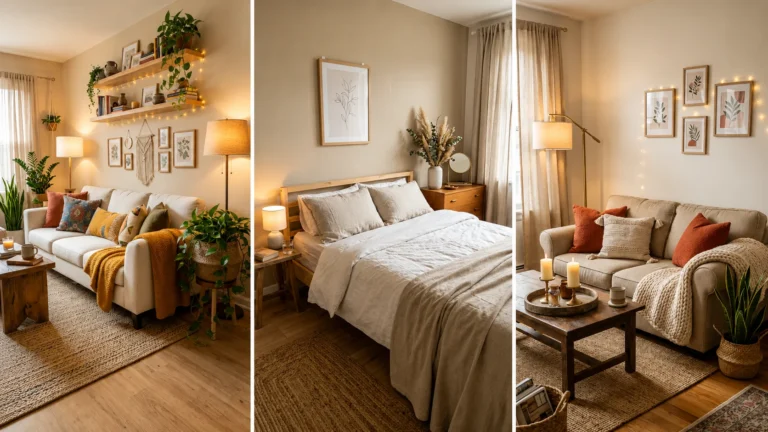
15. Create a Reading Nook With a Single Chair and Lamp
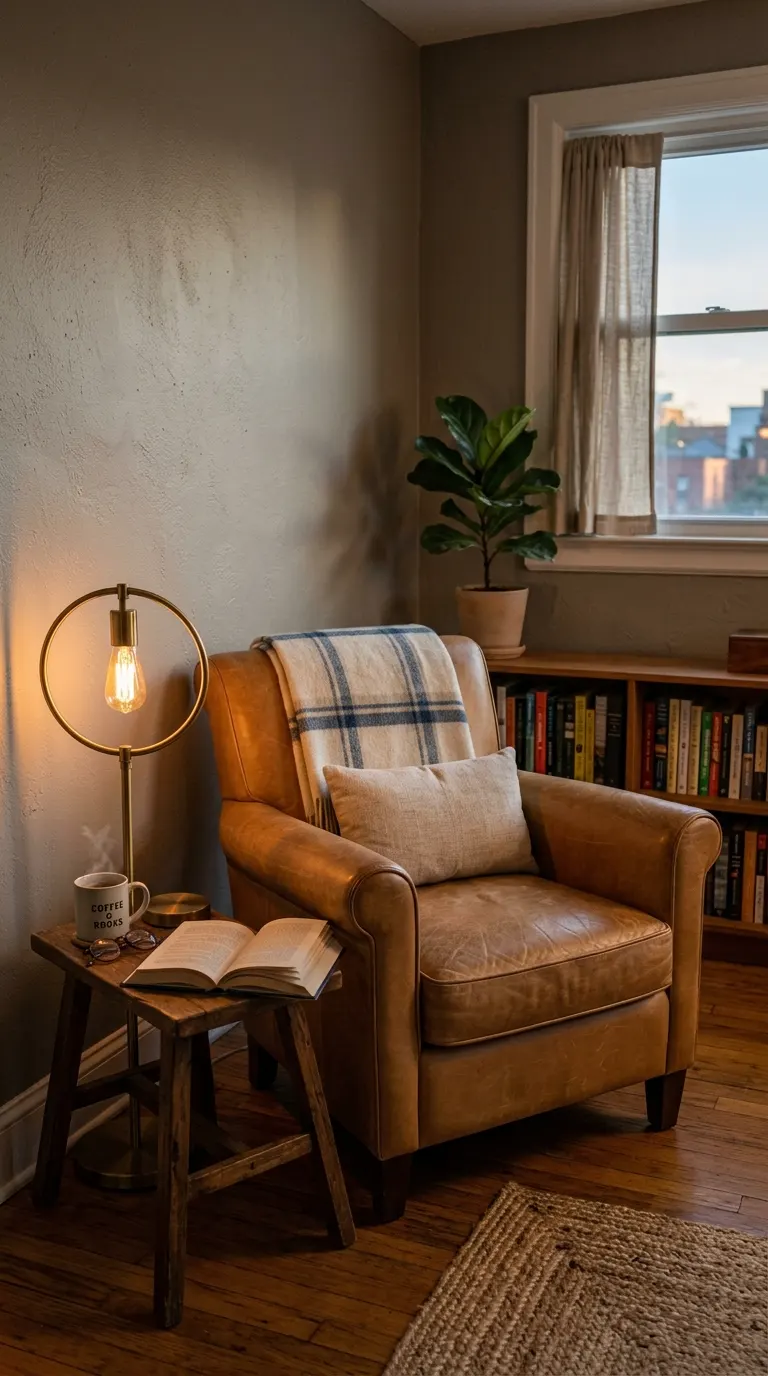
A single accent chair paired with a floor lamp and a small side table instantly signals a reading nook, even without any walls or screens. This pairing works because it mimics the layout of a dedicated reading room in miniature. It is one of the easiest zones to create in a studio with even a small amount of extra space.
Choose a chair scaled to the available corner, since an oversized piece can overwhelm the nook concept. Add a small basket for books or magazines nearby to complete the zone’s function. It is a cozy addition that gives you a clear spot to unwind separate from the main living area.
16. Use Furniture Height to Signal Zone Changes
Varying the height of furniture as you move through the studio, from low coffee tables in the living area to taller nightstands in the sleeping zone, creates a subtle rhythm that signals a shift in purpose. This trick works on a subconscious level, since the eye registers changes in scale even without a clear physical barrier. It is a more advanced styling technique that rewards careful planning.
Sketch out your furniture heights before purchasing new pieces to ensure a natural progression rather than a random mix. Keeping materials consistent across heights, like matching wood tones, ties the variation together. It is a subtle but effective way to organize an open floor plan.
17. Define the Entryway With a Small Console
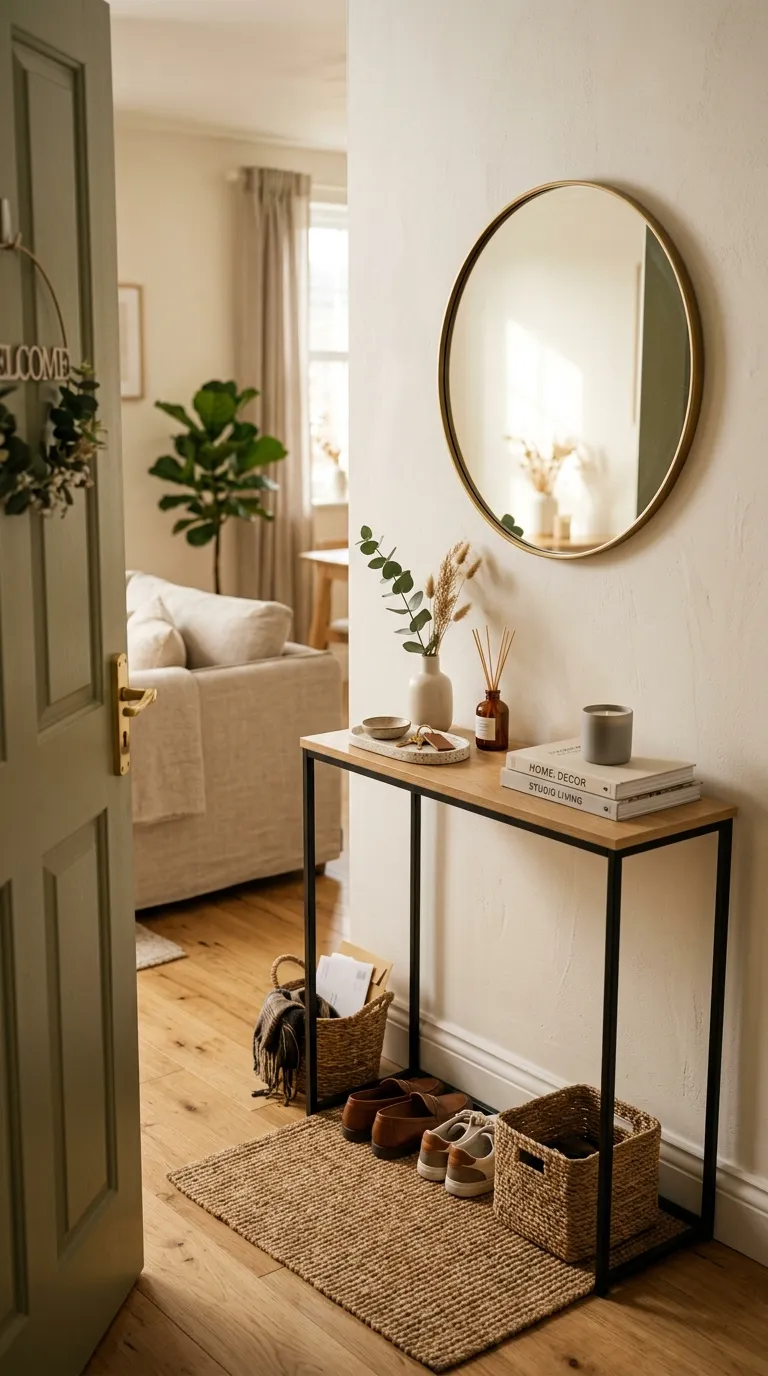
A slim console table placed just inside the front door creates an immediate sense of arrival, separating the entry from the rest of the studio. This small zone gives you a spot to drop keys, mail, or a bag before stepping further into the living space. It is a detail that makes the whole apartment feel more organized from the moment you walk in.
Choose a console narrow enough to avoid blocking the door’s swing path. Add a small tray or bowl on top to keep everyday items contained rather than scattered. It is a simple addition that creates structure right at the entrance.
18. Use a Window Seat as a Natural Boundary
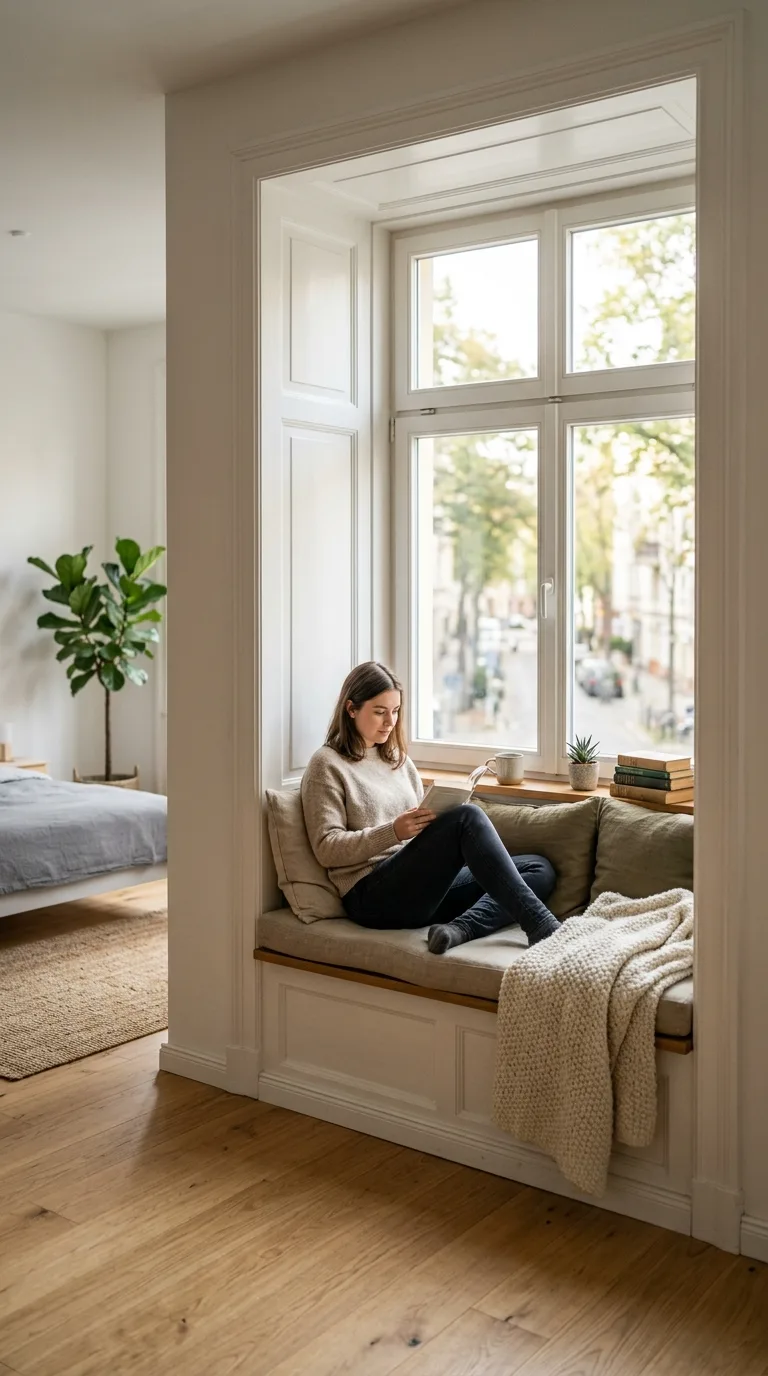
If your studio includes a window nook or bay window, building or styling it as a window seat creates a built-in zone that naturally separates itself from the rest of the room. The architecture does most of the zoning work for you, requiring only cushions and styling to complete the look. This works particularly well for reading corners or casual seating.
Add a few cushions and a throw blanket to make the nook feel inviting rather than purely decorative. Storage benches built into the window seat add function without taking up additional floor space. It is a feature that turns an awkward architectural quirk into a defined zone.
19. Position the Sofa Back to the Bed
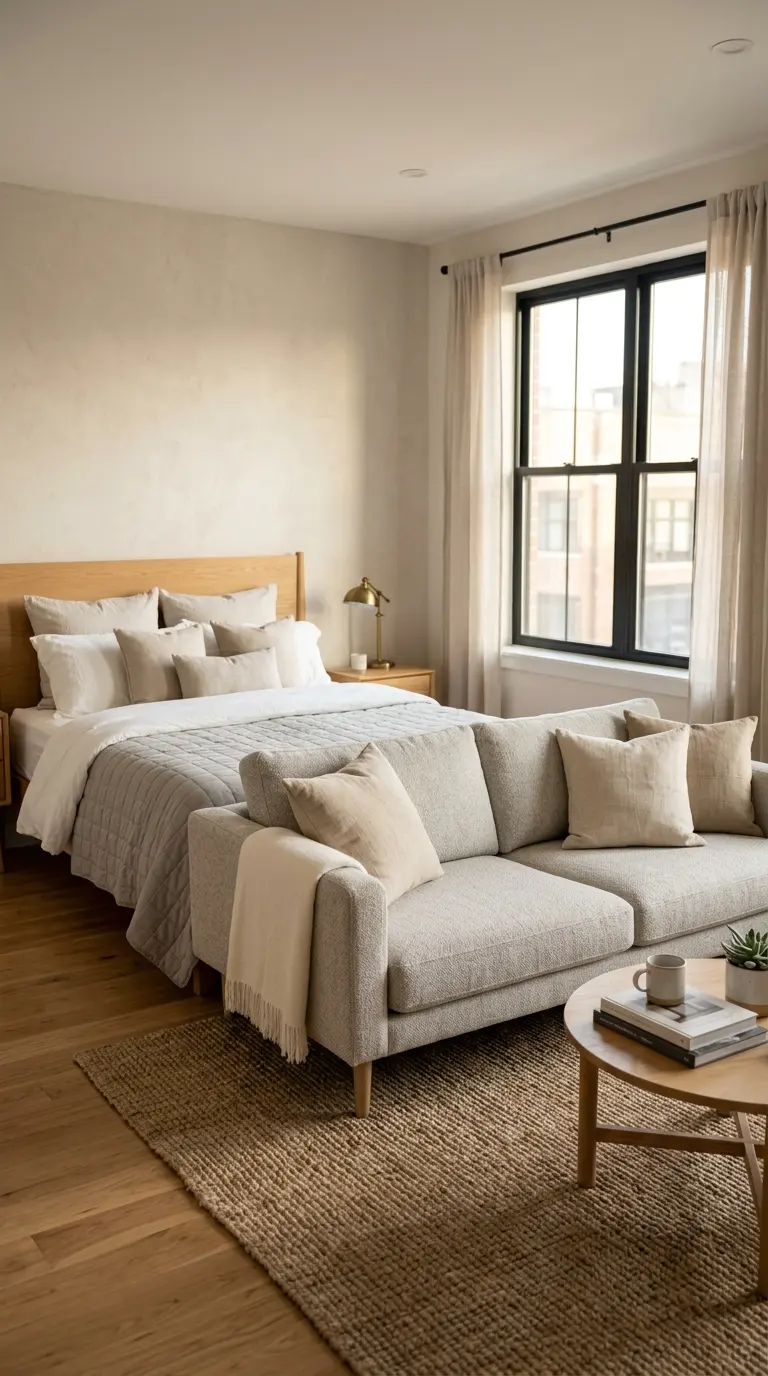
Similar to placing the bed behind the sofa, positioning the sofa with its back facing the bed creates a boundary using the furniture’s natural shape. This arrangement works well in studios where the bed and living area share a single open stretch of floor. The sofa back becomes a soft wall that blocks the bed from being the first thing visible upon entering.
Leave enough clearance behind the sofa for comfortable movement between the two zones. A console table or narrow shelf along the sofa back adds function while reinforcing the separation. It is a layout trick that works with furniture most people already own.
20. Use a Folding Table for a Flexible Dining Zone
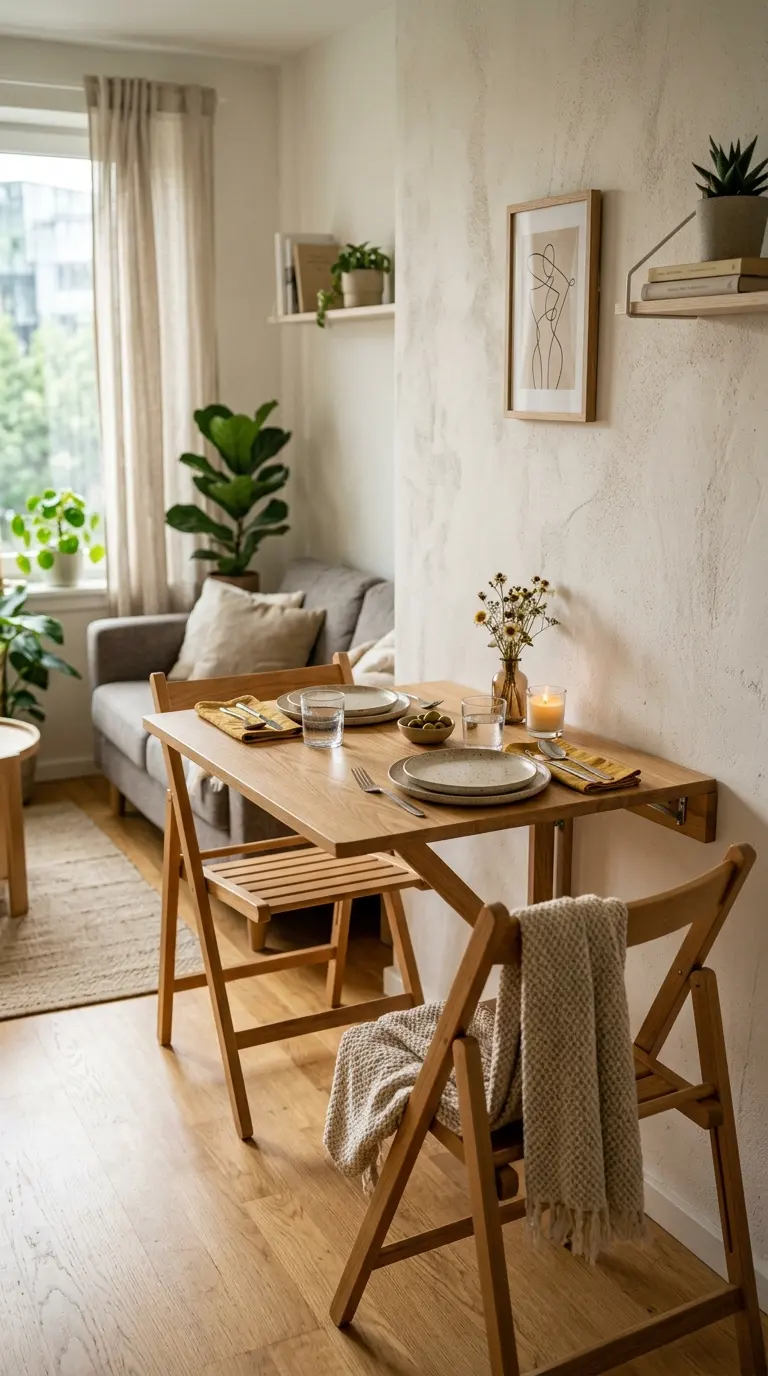
A folding table that mounts to the wall or collapses when not in use allows a dining zone to appear and disappear as needed. This flexibility is especially useful in very small studios where a permanent dining area would crowd the rest of the room. The zone exists only when you need it, then disappears the rest of the time.
Choose a sturdy wall bracket if you are mounting the table, since this hardware bears the weight of dishes and daily use. Pair the table with folding chairs that hang on a nearby hook for a fully collapsible setup. It is a smart solution for studios that need every inch to multitask.
- Use rugs to define at least two distinct zones in your studio
- Vary lighting types and placement to reinforce each zone’s purpose
- Position furniture backs to create soft visual barriers between areas
- Keep color and material choices cohesive across different zones
- Check safety and exit requirements before placing tall furniture near doors
21. Layer Different Lighting Temperatures by Zone
Using warmer light bulbs in the living and sleeping areas while choosing a slightly cooler, more energizing tone for a workspace helps each zone feel distinct, even side by side. This trick relies on how light temperature affects mood and focus, reinforcing the function of each area subconsciously. It works in any studio, regardless of layout.
Choose bulbs in the 2700 kelvin range for cozy zones and closer to 3500 kelvin for task-focused areas. Smart bulbs make it easy to adjust temperature without buying multiple lamp types. It is a lighting strategy that does a lot of psychological work in a small space.
22. Use a Storage Bench to Separate Two Areas
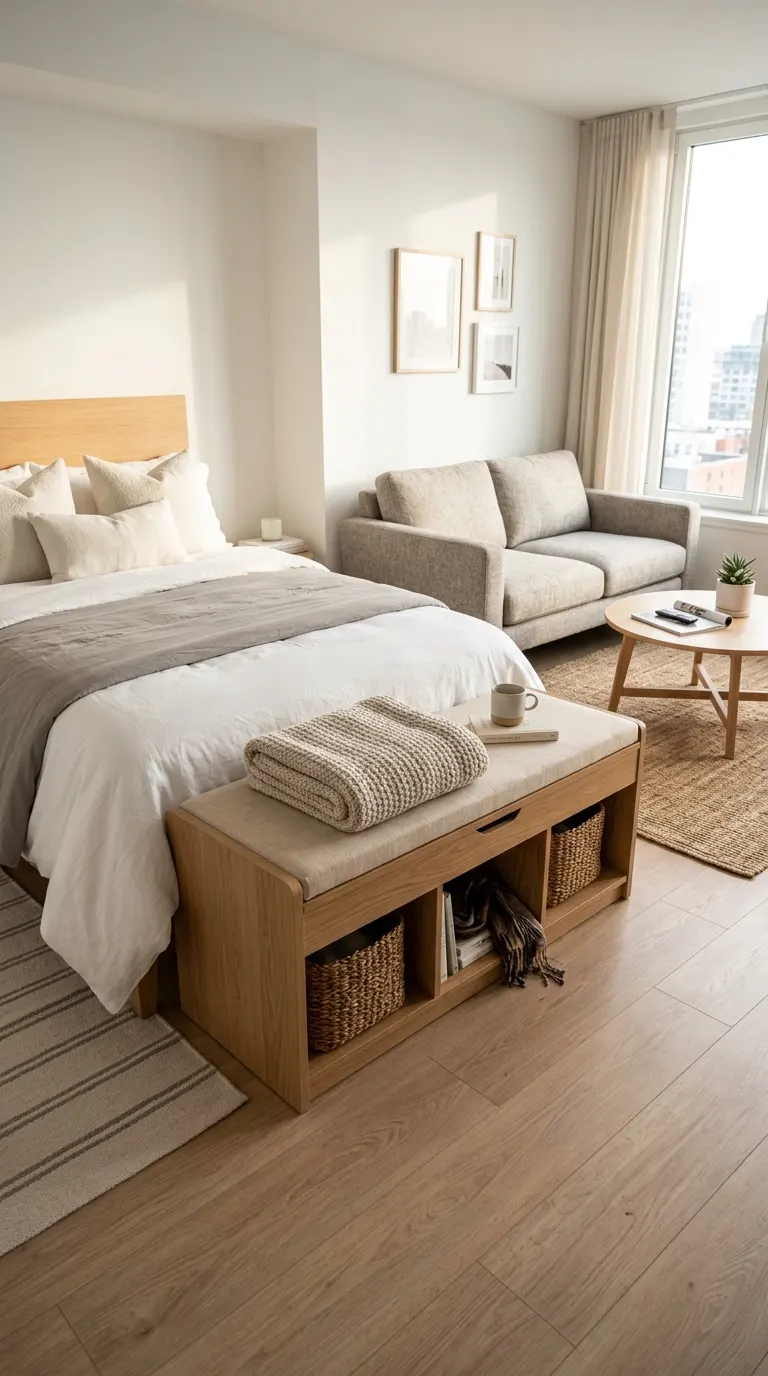
A storage bench placed between two zones, such as the foot of the bed and the edge of the living area, creates a literal and functional boundary. It gives you a place to sit, store extra linens, or display decor while marking where one space ends and another begins. This piece works especially well in studios with a long, narrow layout.
Choose a bench with a lid that lifts smoothly for easy access to the storage inside. Style the top with a tray or a folded throw to keep it looking intentional rather than purely functional. It is a multi-purpose piece that earns its spot as a zoning tool.
23. Create a Mini Mudroom Near the Entrance
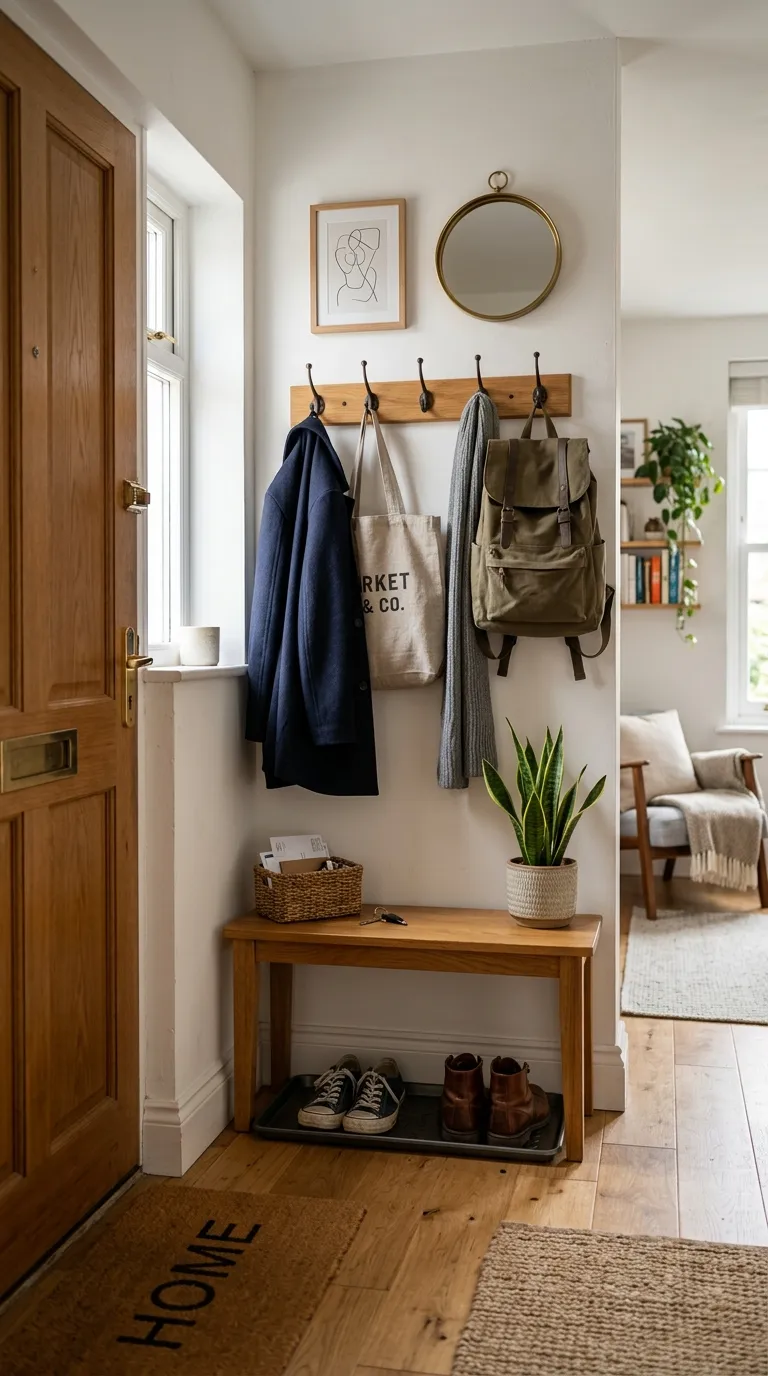
Even a small studio can benefit from a designated mudroom-style zone near the front door, complete with hooks, a small bench, or a shoe tray. This area keeps outdoor clutter contained and creates a clear transition point between the outside world and your living space. It is especially useful in climates with rain or snow.
Choose wall-mounted hooks to save floor space, paired with a slim shoe tray to catch dirt and moisture. A small rug in this zone helps define the boundary and protects your main flooring. It is a practical zone that improves daily function as much as visual organization.
24. Use a Gallery Wall to Mark a Living Zone
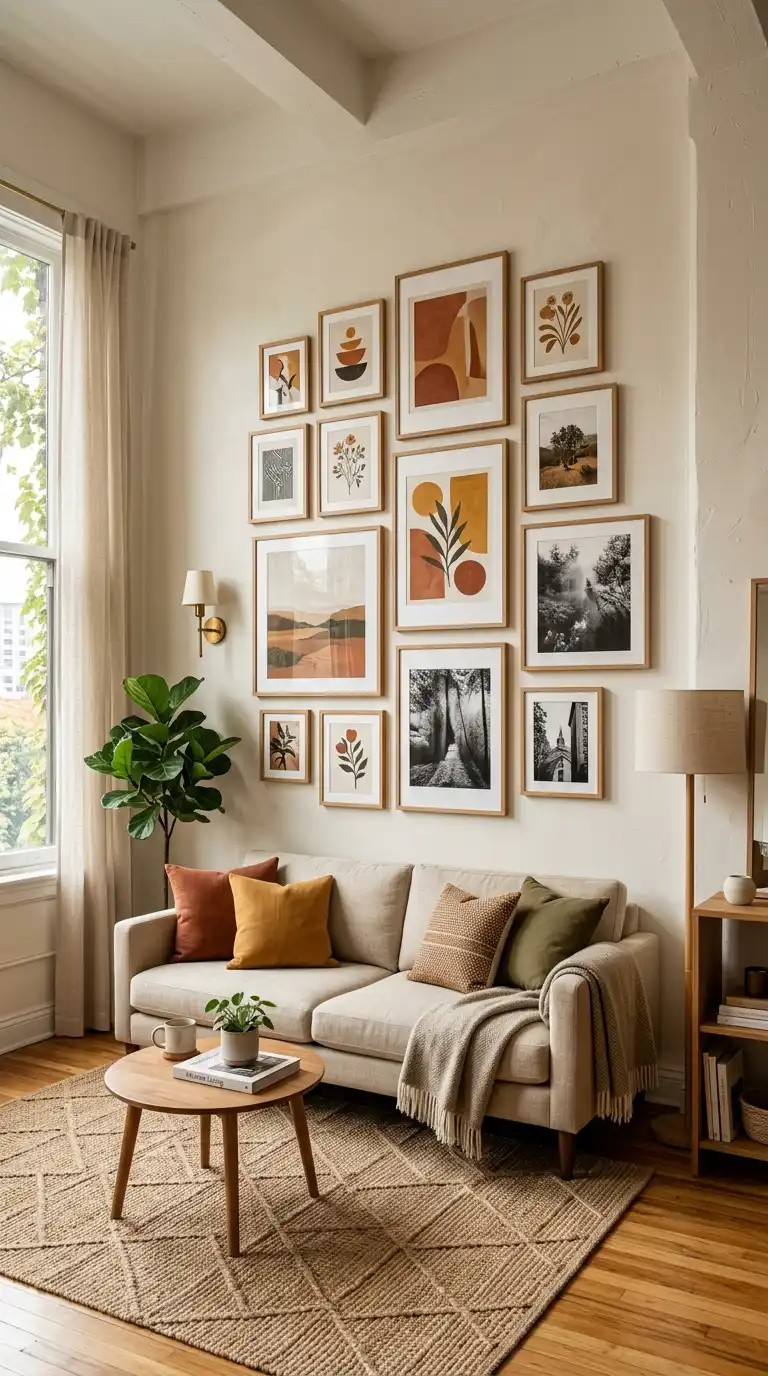
A cluster of framed art or photos arranged on one wall draws attention to a specific area, reinforcing it as a distinct zone within the studio. This works particularly well above a sofa or behind a desk, where the artwork signals the function of the space beneath it. The visual weight of the gallery wall anchors the eye to that section of the room.
Choose a consistent frame style or color for a cohesive look, even if the artwork itself varies. Keep the gallery wall contained to one section rather than spreading frames across multiple zones. It is a decorative trick that does double duty as a spatial cue.
25. Define a Vanity Corner With a Mirror and Stool
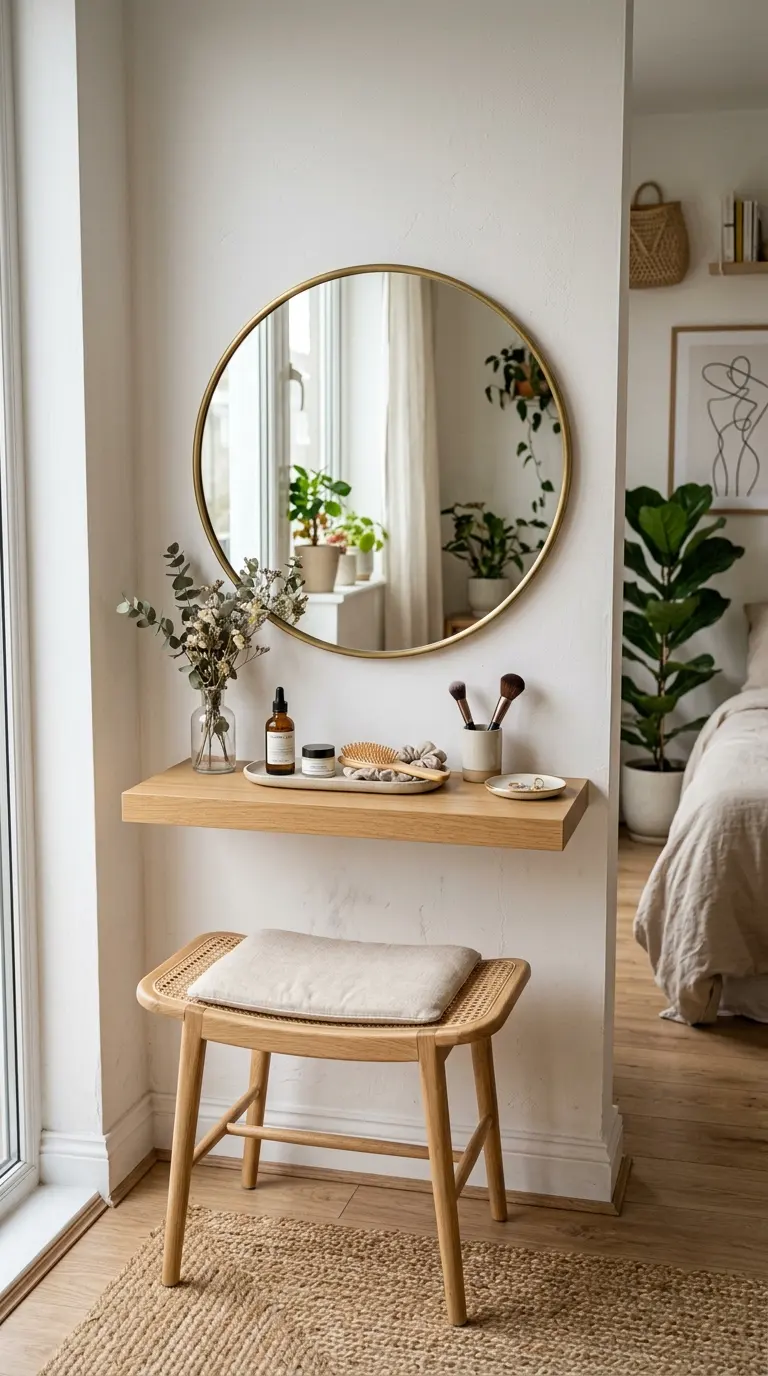
A small vanity setup, consisting of a mirror, a stool, and perhaps a slim shelf, creates a personal grooming zone separate from the rest of the studio. This works well tucked into a corner near a closet or bathroom entrance. It gives you a dedicated spot for getting ready without taking over the main living area.
Choose a wall-mounted mirror to save floor space, paired with a small stool that tucks away when not in use. Add a small tray for makeup or grooming essentials to keep the surface organized. It is a personal touch that adds function to an otherwise underused corner.
Pro Tip: When creating multiple small zones in a studio, like a vanity corner or reading nook, keep their footprint intentionally compact. Oversized furniture in these secondary zones can crowd the main living and sleeping areas.
26. Use Curtains as a Soft Ceiling-to-Floor Boundary
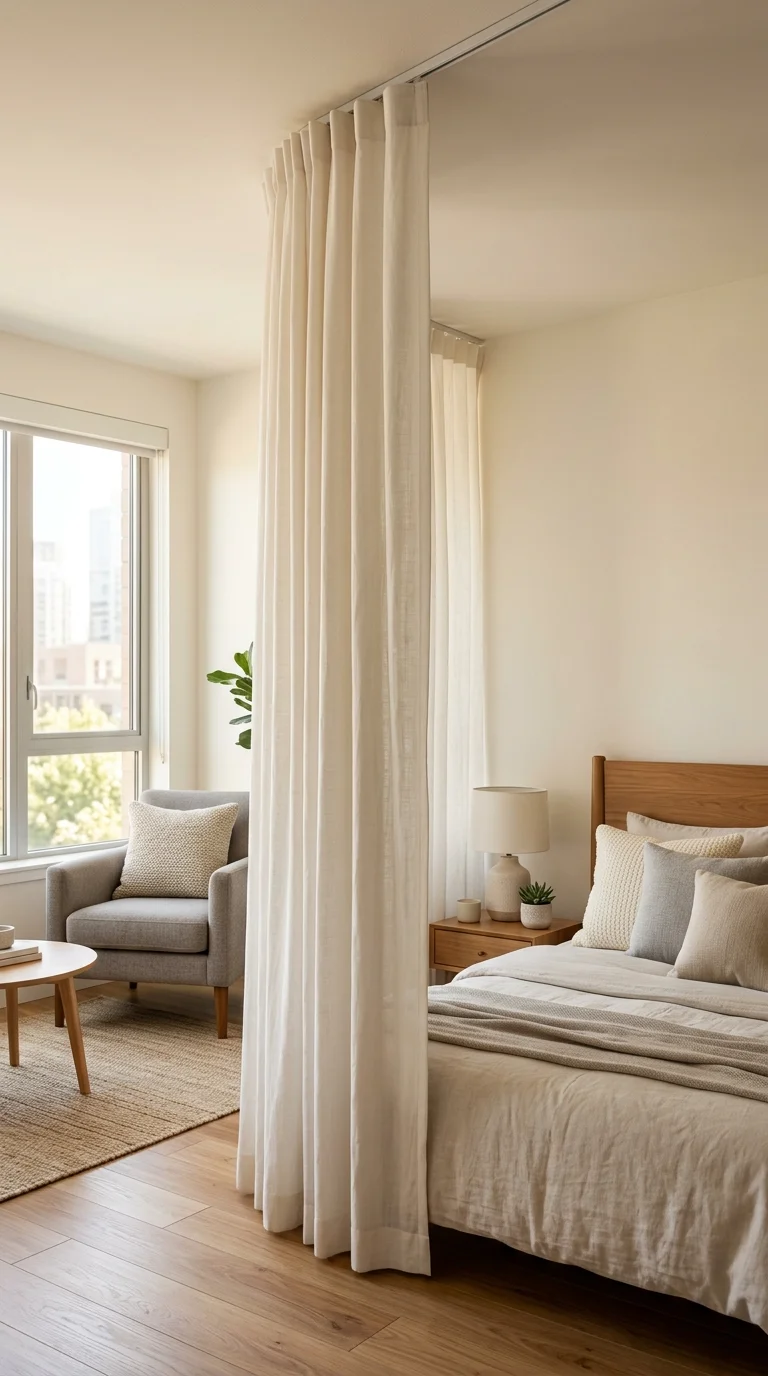
A curtain panel hung from a ceiling track creates a temporary, movable boundary that you can open or close depending on your need for privacy. This option works well for separating a sleeping nook from the main room without committing to a permanent structure. It is especially popular among renters who want flexibility.
Choose a heavier fabric if you want better light and sound blocking, or a sheer option if you only want a visual cue. The track allows you to fully open the space when guests are over. It is one of the most adaptable zoning tools available for a studio.
27. Place a Plant Cluster at a Transition Point
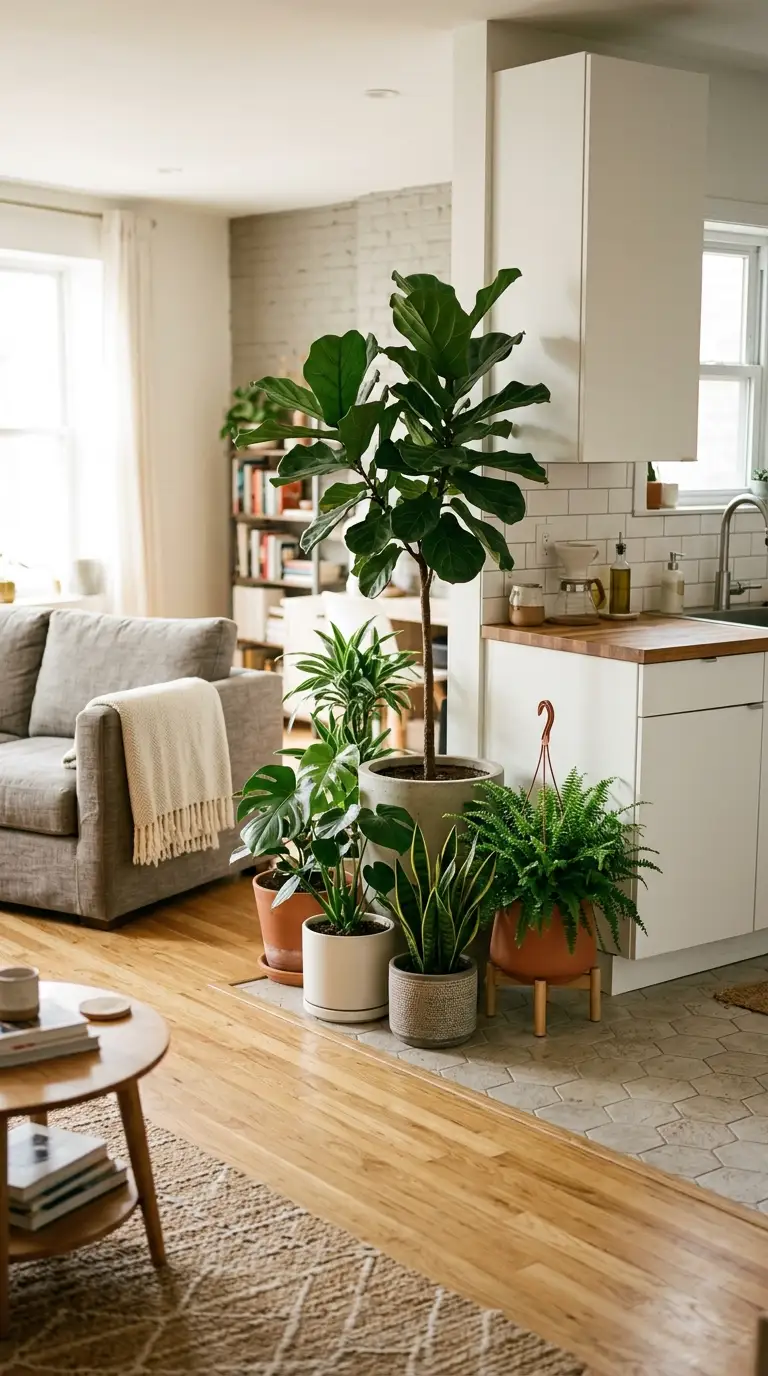
A grouping of plants at varying heights placed at the edge of a zone creates a natural, living boundary that softens the transition between two areas. This works well between a kitchen and living space, or along the edge of a sleeping nook. The greenery adds life to the studio while subtly marking where one function ends and another begins.
Choose plants that thrive in your studio’s available light, since a struggling plant undermines the intended effect. Vary the pot heights and plant types for a layered, natural look. It is an affordable and visually appealing way to mark a boundary.
28. Use a Patterned Rug to Contrast Zones

A patterned rug in the living area, paired with a solid-colored rug in the sleeping zone, creates contrast that helps the eye distinguish between the two spaces. This trick relies on visual variety rather than just placement to reinforce the zoning. It works especially well in studios with a more eclectic or maximalist design style.
Choose a pattern that complements your existing color palette rather than introducing entirely new tones. Keep the contrast between rugs noticeable but not jarring. It is a styling choice that adds personality while doing functional work.
29. Create a Closet Nook With a Curtain Panel
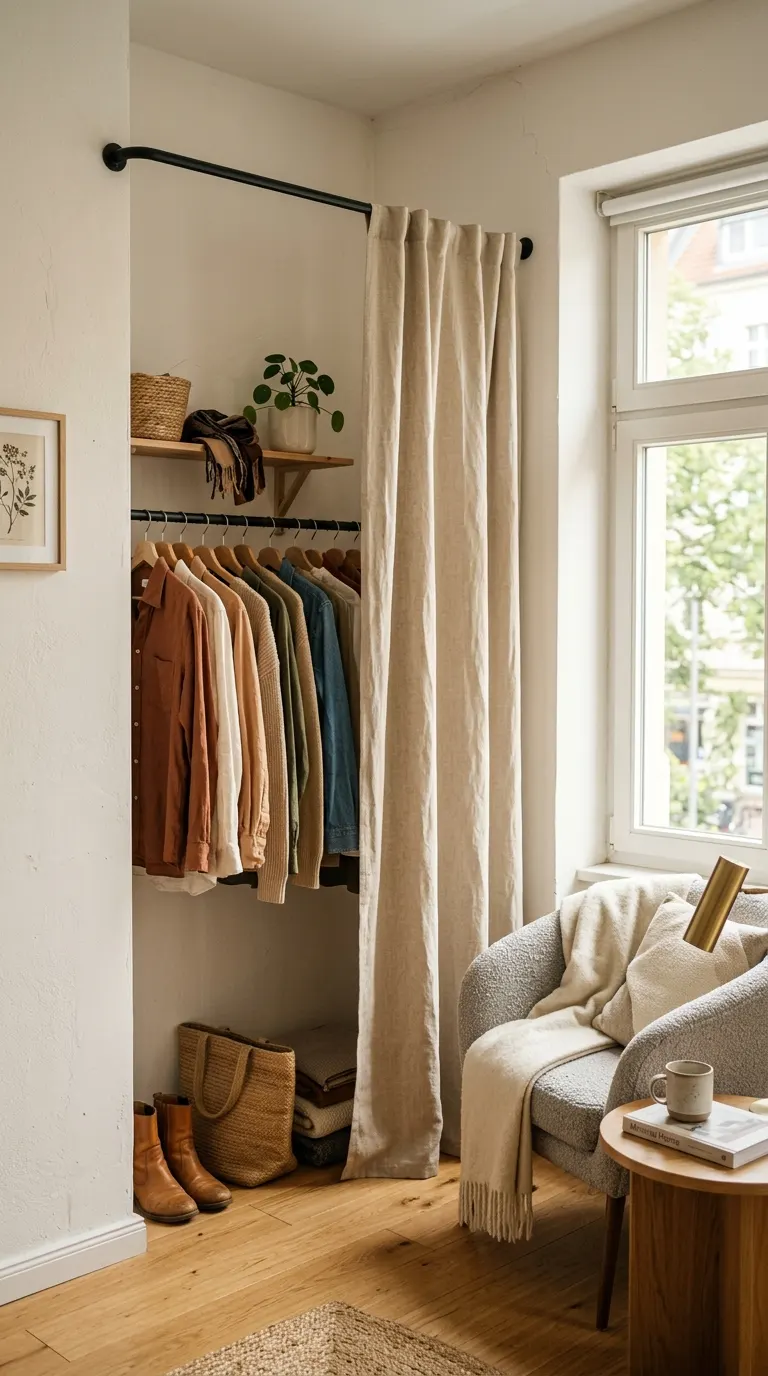
If your studio lacks a traditional closet, a curtain panel hung in front of an open clothing rack creates a designated storage zone that stays visually tucked away. This solution works well in studios with awkward, underused corners that are not large enough for furniture. The curtain hides the function while still marking the space as distinct.
Choose a curtain fabric that matches your room’s palette so it blends in rather than standing out. A simple tension rod makes installation quick and renter-friendly. It is a clever way to carve out storage without sacrificing floor space elsewhere.
30. Use a Low Bookshelf as a Visual Break
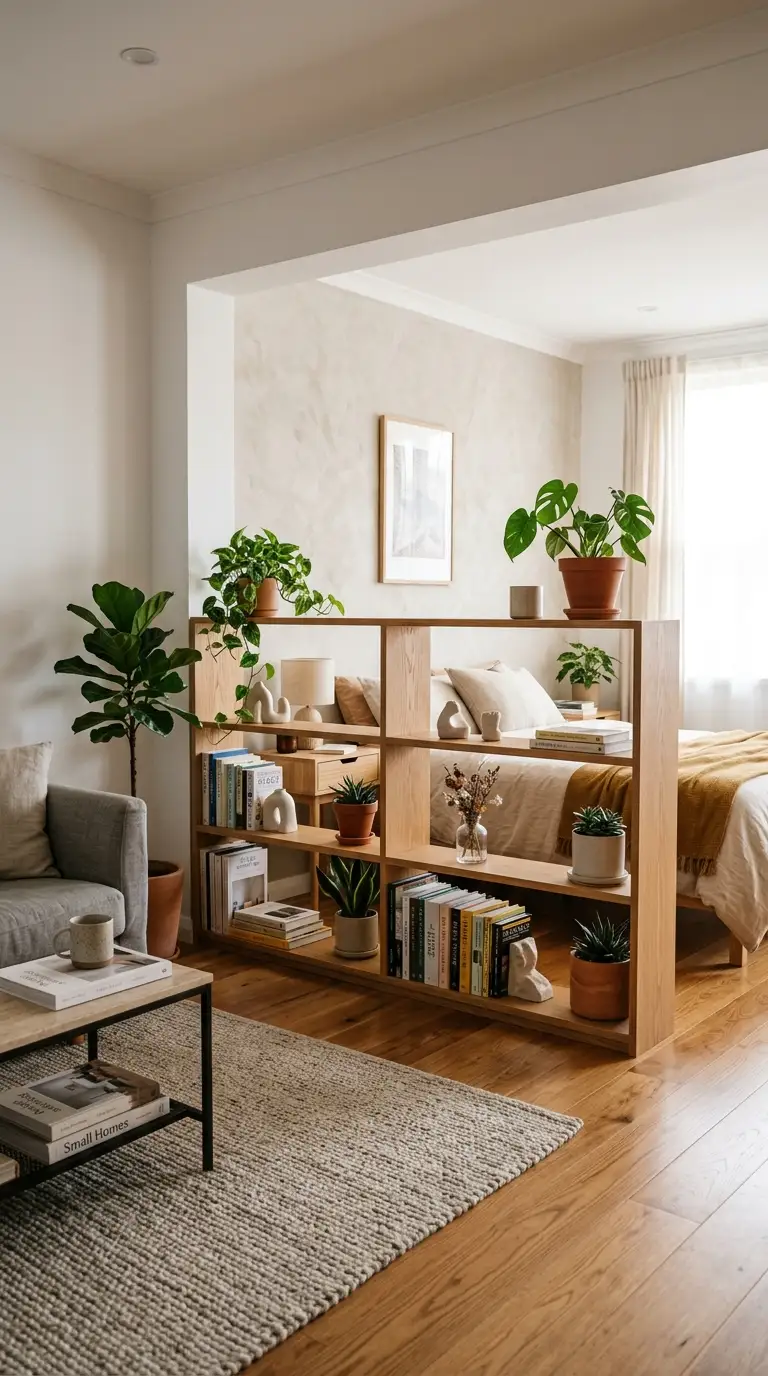
A low, open bookshelf placed between two zones offers just enough height to suggest a boundary without fully blocking sightlines or light. This option works well for studios that want some separation but still need the space to feel open and airy. It also adds useful storage and display space along the way.
Choose a shelf height that sits below eye level when seated, so it does not feel like a wall when you are sitting on the sofa or bed. Style both sides of the shelf if it is open, since each zone will see a different face of the piece. It is a balanced solution between an open and a fully divided layout.
31. Define a TV Zone With a Media Console
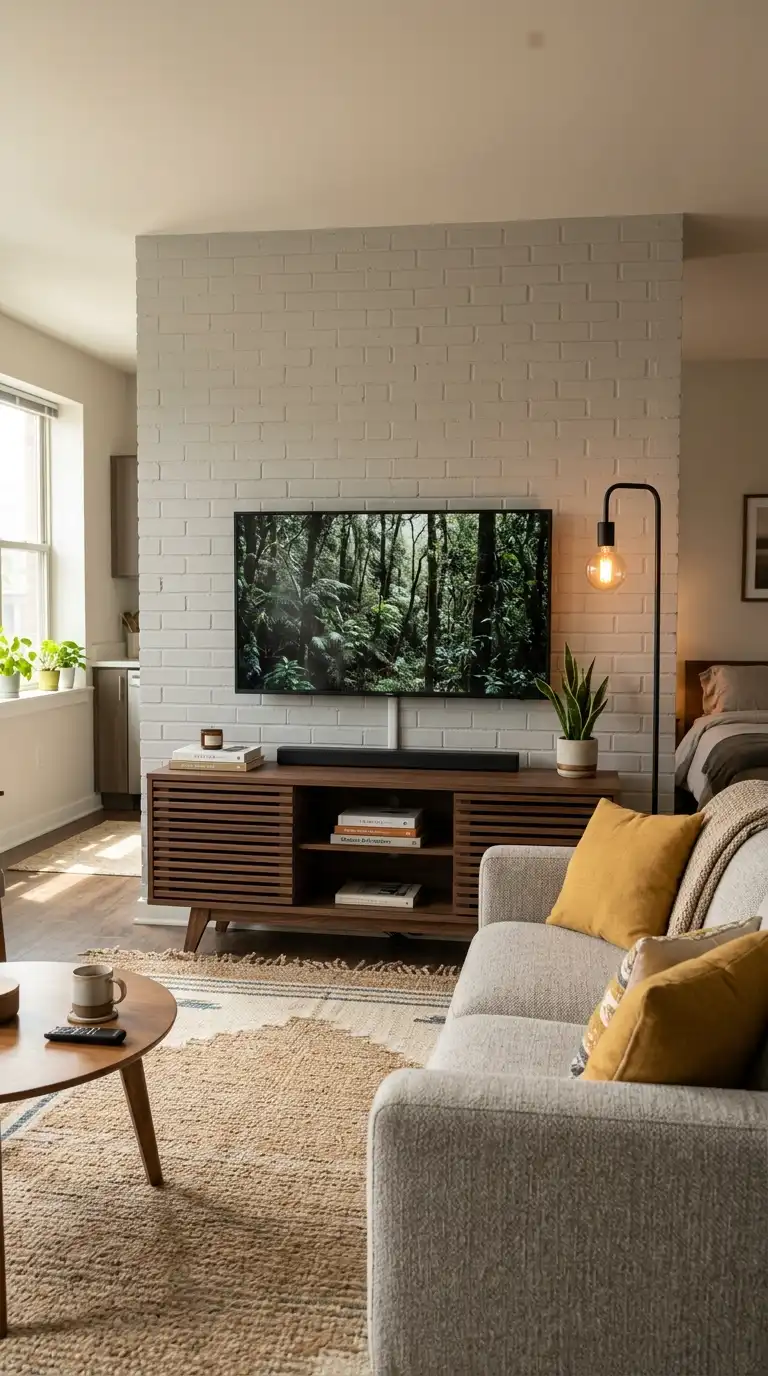
A media console placed against a wall, paired with a rug and seating arranged around it, clearly signals a dedicated television and lounging zone within the studio. This setup works well even without a separate living room, since the furniture arrangement alone does the zoning work. It creates a focal point that organizes the surrounding seating.
Choose a console sized appropriately for the wall and television, since an oversized piece can dominate a small studio. Keep cords and clutter hidden within the console’s storage to maintain a clean look. It is a familiar setup that translates naturally into a studio layout.
32. Use Symmetry to Anchor the Living Area
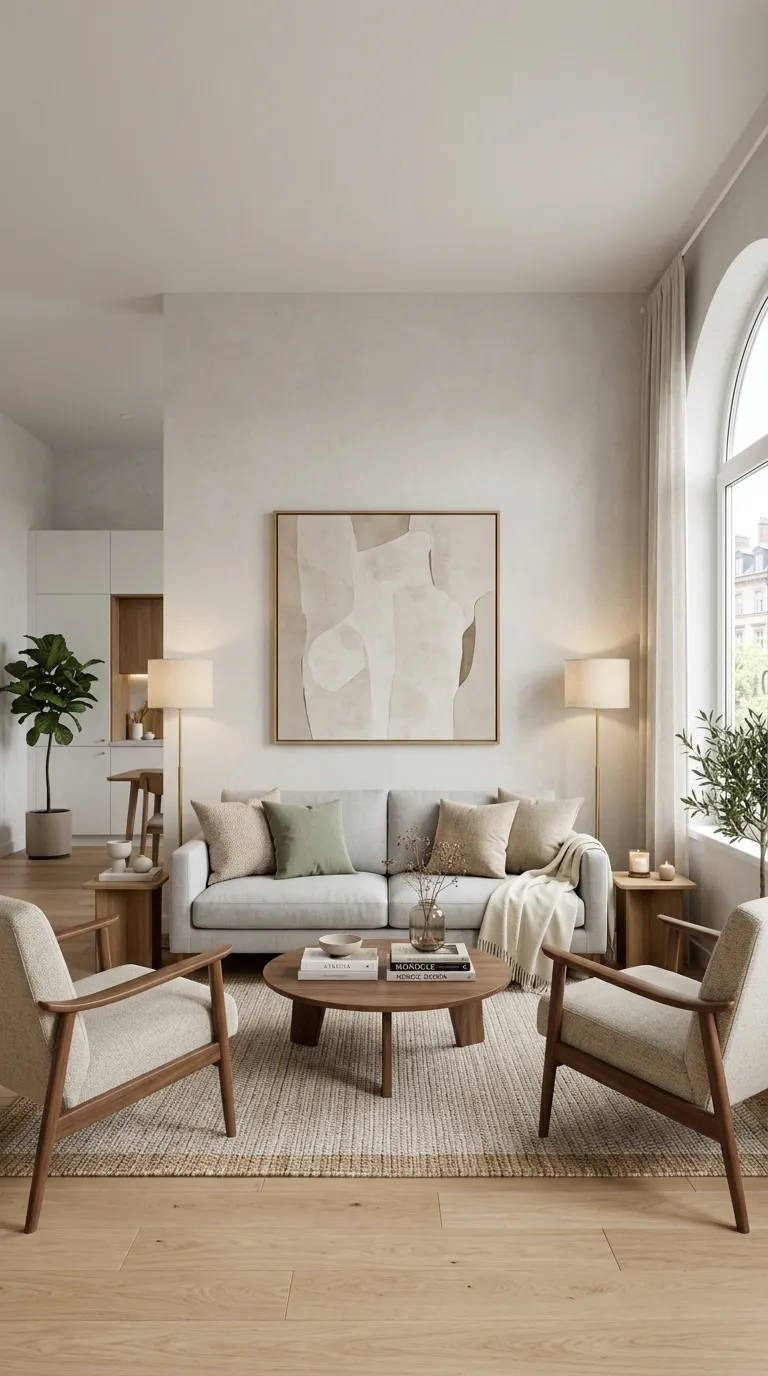
Arranging furniture symmetrically, such as two matching chairs flanking a sofa or a pair of lamps on either side of a console, creates a sense of order that visually anchors the living zone. Symmetry signals intentionality, which helps a small space feel curated rather than thrown together. This trick works in almost any design style.
Choose matching or closely coordinated pieces for the symmetrical elements, since mismatched items undercut the effect. Keep the rest of the studio slightly more relaxed in arrangement to avoid feeling overly formal. It is a styling principle that designers rely on for small spaces especially.
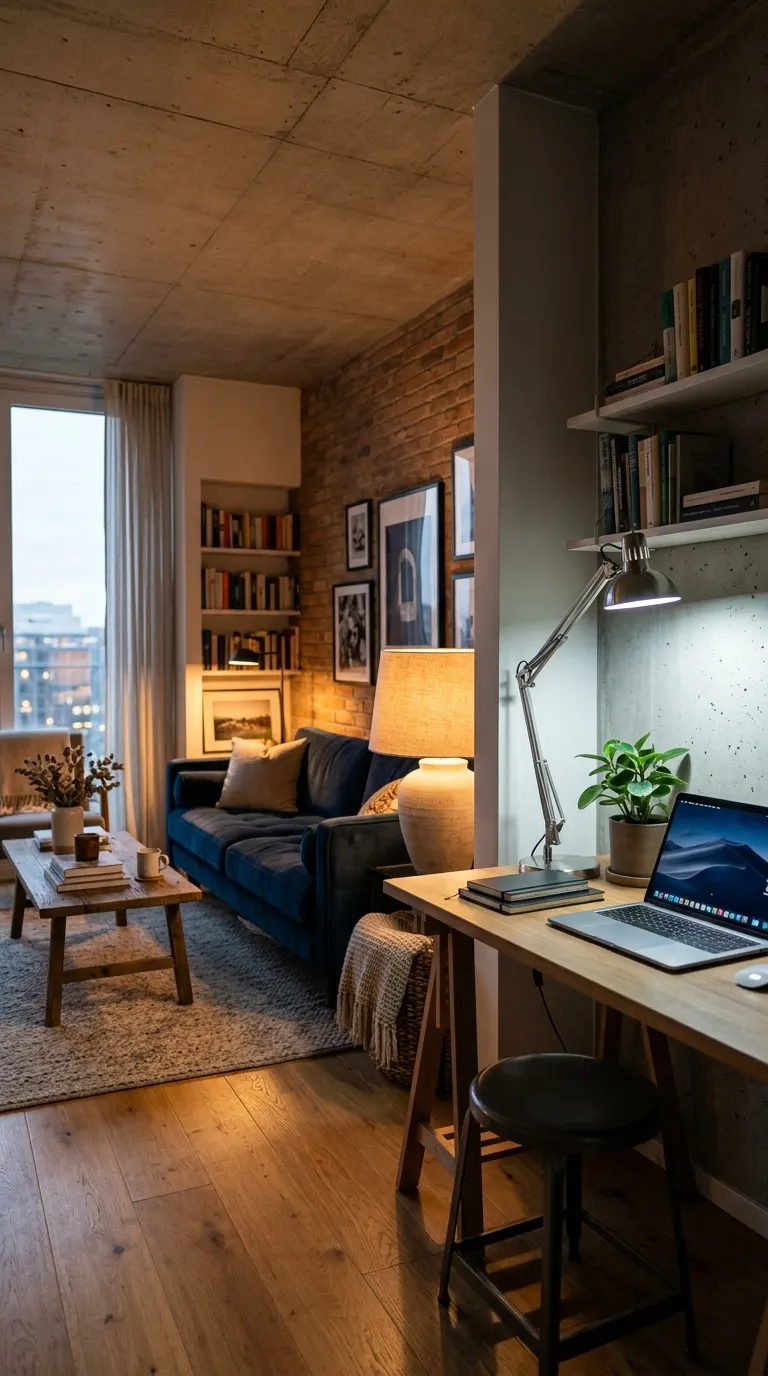
33. Create a Compact Home Office Corner
A small desk, a chair, and a single shelf tucked into an underused corner can function as a dedicated home office zone without taking over the studio. This setup benefits from the lighting and furniture height tricks mentioned earlier, layering several zoning strategies into one small area. It gives remote workers a place to mentally clock in and out of work mode.
Choose a desk that fits the available corner without blocking walking paths to other zones. Add a desk lamp and a small plant to make the corner feel complete rather than makeshift. It is one of the most requested zones in modern studio layouts.
34. Use a Canopy Bed Frame for Definition
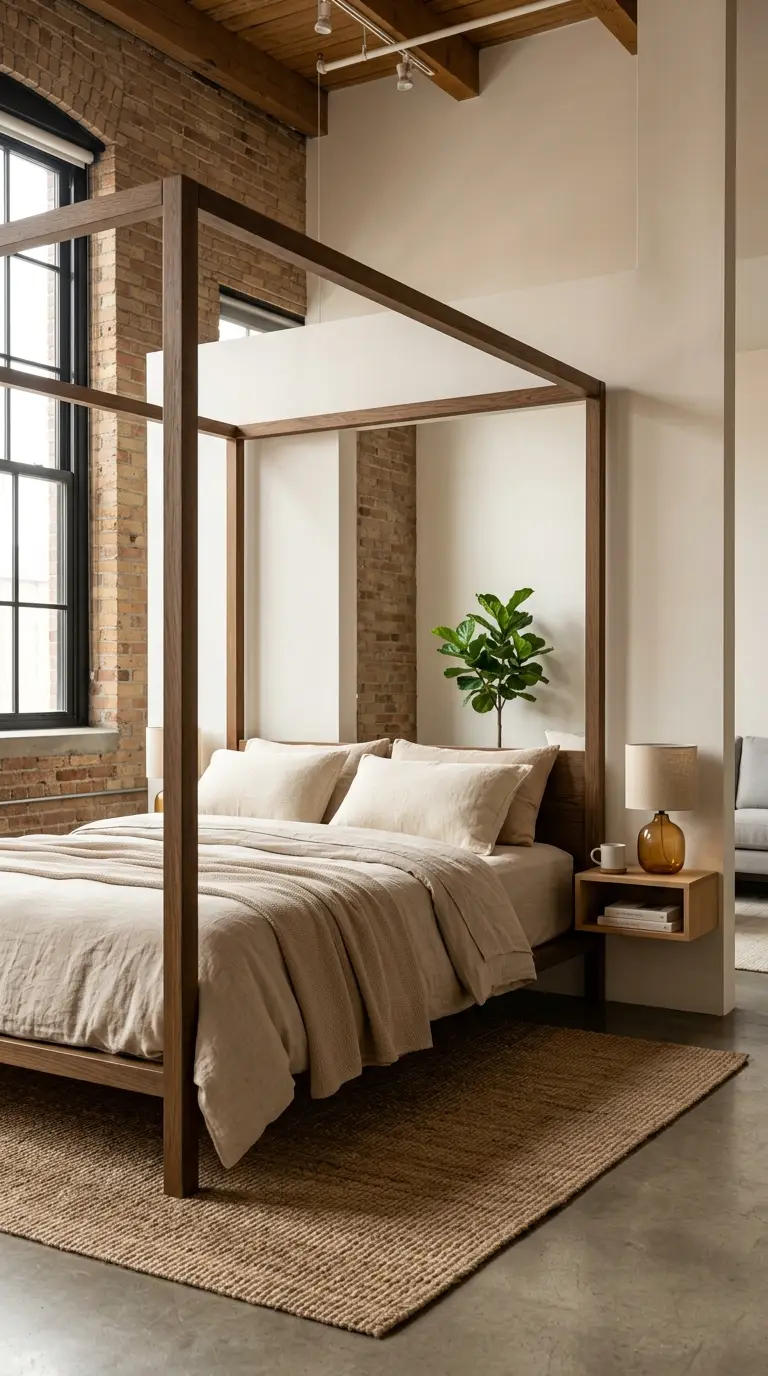
A canopy bed frame, even without curtains attached, creates a sense of architecture around the sleeping zone that a standard bed frame cannot replicate. The vertical posts draw a visual boundary around the bed, making it feel like its own contained space. This works particularly well in studios with higher ceilings that can accommodate the frame’s height.
Choose a frame with a finish that matches your existing furniture for cohesion. Adding sheer curtains to the canopy later can increase privacy if desired. It is a furniture-based solution that adds architectural presence to the sleeping zone.
35. Position Furniture to Create Natural Walkways
Arranging furniture so those clear, intentional pathways exist between zones helps the eye and body both understand how the space is organized. Without these walkways, a studio can feel like one undifferentiated block of furniture rather than a series of connected but distinct areas. This trick requires careful planning but pays off in daily livability.
Measure your walking paths to ensure at least two feet of clearance between major furniture pieces. Use rugs or flooring changes to reinforce these pathways further. It is a layout principle that supports every other zoning trick on this list.
36. Use a Statement Light Fixture to Mark a Zone
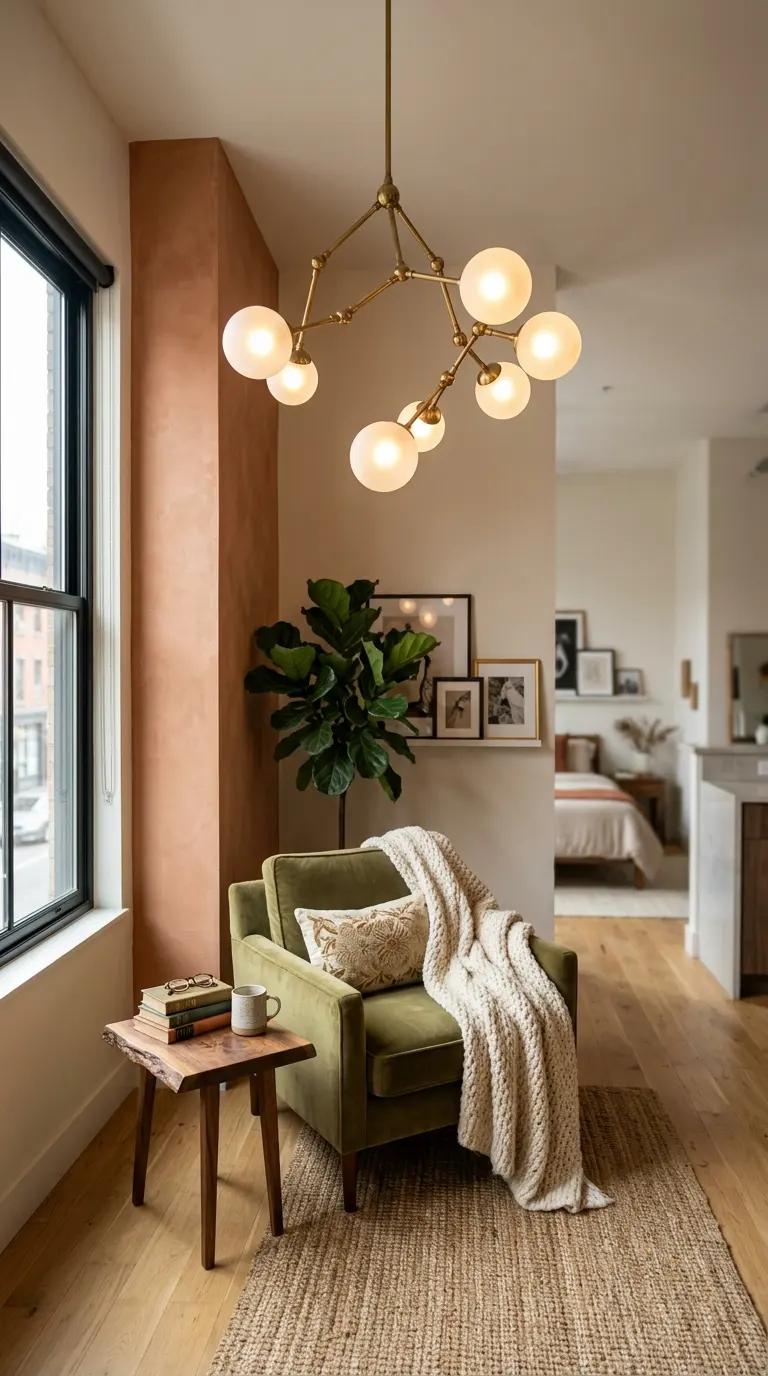
A bold, eye-catching light fixture hung over a specific area, like a sculptural pendant over a reading chair or a unique chandelier over a small dining table, draws attention and signals that the spot beneath it serves a distinct purpose. This trick combines lighting with decor to do double duty in a small space. It works best when the fixture’s style aligns with the room’s overall aesthetic.
Choose a fixture scaled appropriately to the space beneath it, since an oversized piece can overwhelm a small zone. Make sure the fixture provides enough actual light for the zone’s function, not just visual impact. It is a design-forward way to mark a boundary while adding personality.
37. Define a Yoga or Workout Corner
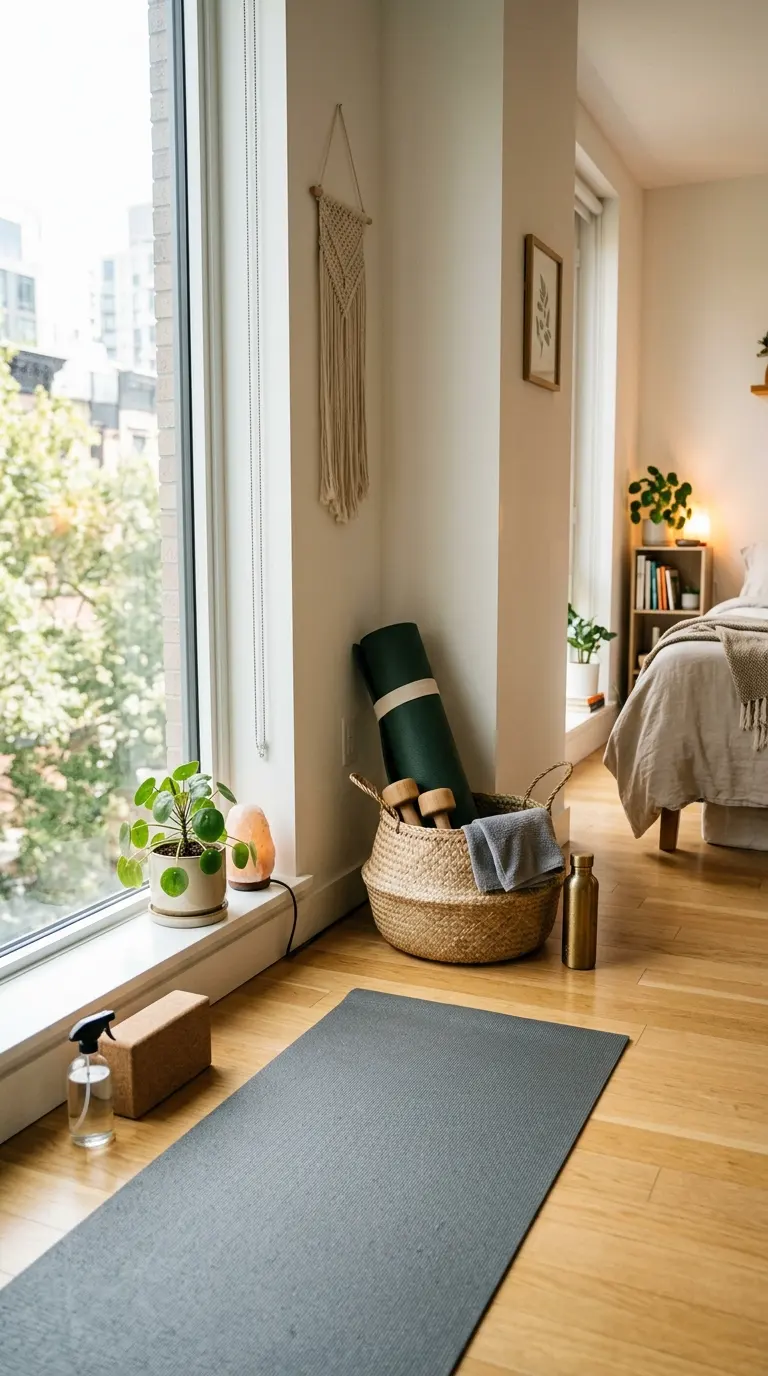
A rolled-up yoga mat, a small storage basket for weights, and a clear patch of floor signal a dedicated workout zone within a studio. This area does not need much, just enough open space and a visual cue that the spot serves a specific function. It works well near a window where natural light supports morning workouts.
Choose a basket or small shelf to keep equipment tidy when not in use, rather than leaving items scattered on the floor. A small rug can mark the boundary of the zone without permanently committing the space to this single use. It is a flexible zone that can shift purpose throughout the day if needed.
38. Use a Folding Screen for the Bedroom Zone
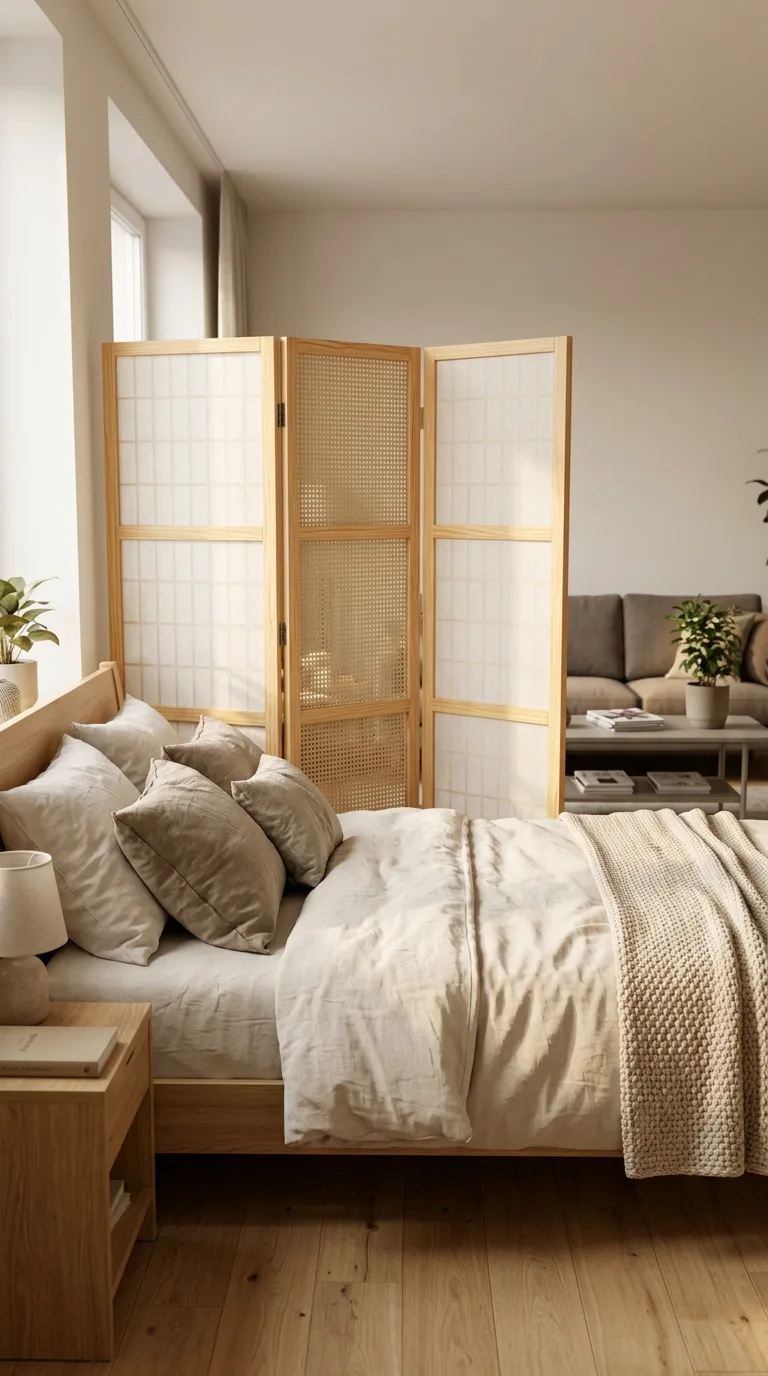
A folding screen placed beside or behind the bed offers a movable, temporary boundary that you can adjust depending on your need for privacy. This option works especially well for studios that host guests occasionally, since the screen can be folded away when not needed. It adds a soft visual break without requiring any permanent installation.
Choose a screen tall enough to block sightlines effectively from a seated position on the sofa. A lightweight, foldable design makes storage easy when the screen is not in use. It is one of the most flexible zoning tools for a sleeping area.
39. Create a Coffee Station Near the Kitchen Edge
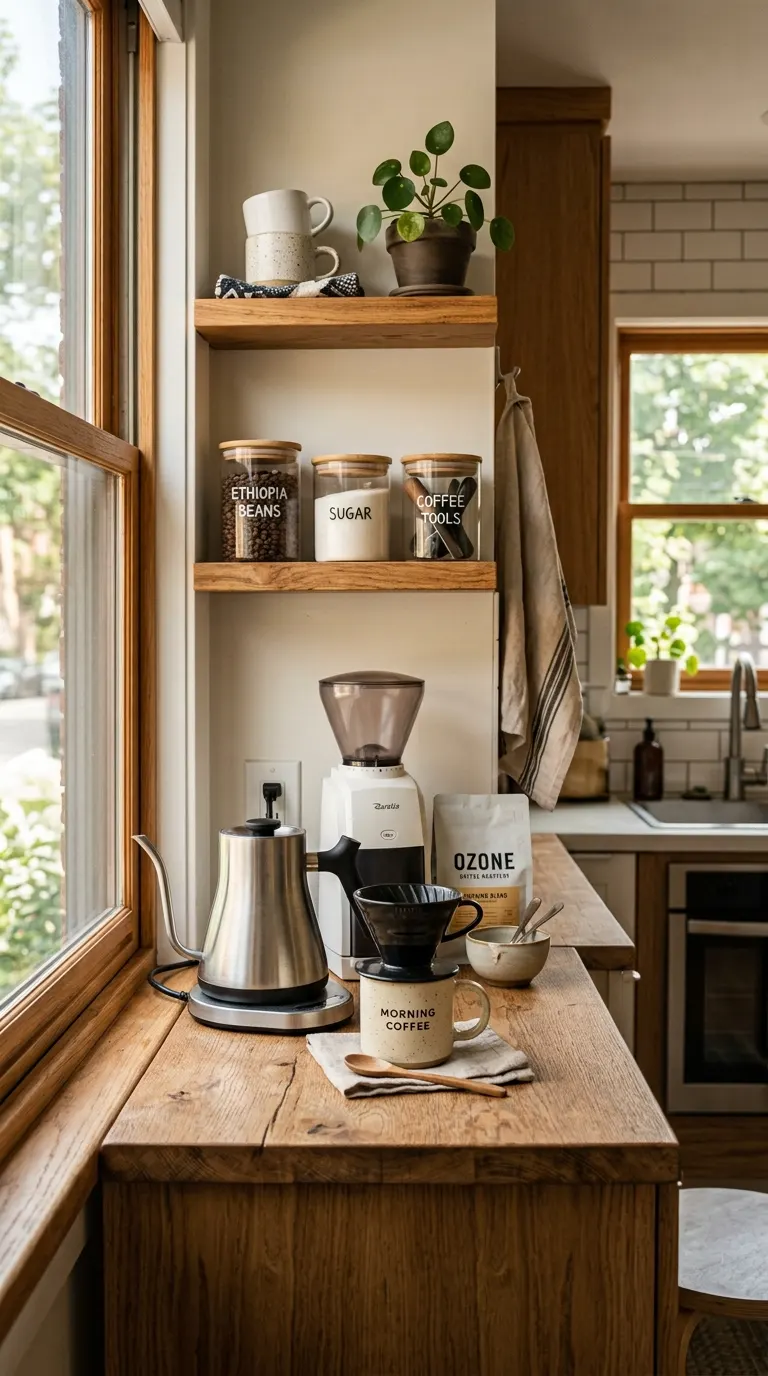
A small coffee station, complete with a kettle, mugs, and a few jars, defines a specific corner of the kitchen as a daily ritual zone separate from general food prep. This works well on a narrow counter or a small cart positioned at the kitchen’s edge. It gives the morning routine its own dedicated, organized spot.
Choose a tray to contain the station’s items, keeping the surrounding counter space clear for other tasks. A small shelf above the station adds storage for mugs or coffee supplies. It is a tiny zone with a big impact on daily routine and organization.
40. Use a Single Accent Wall to Anchor a Zone
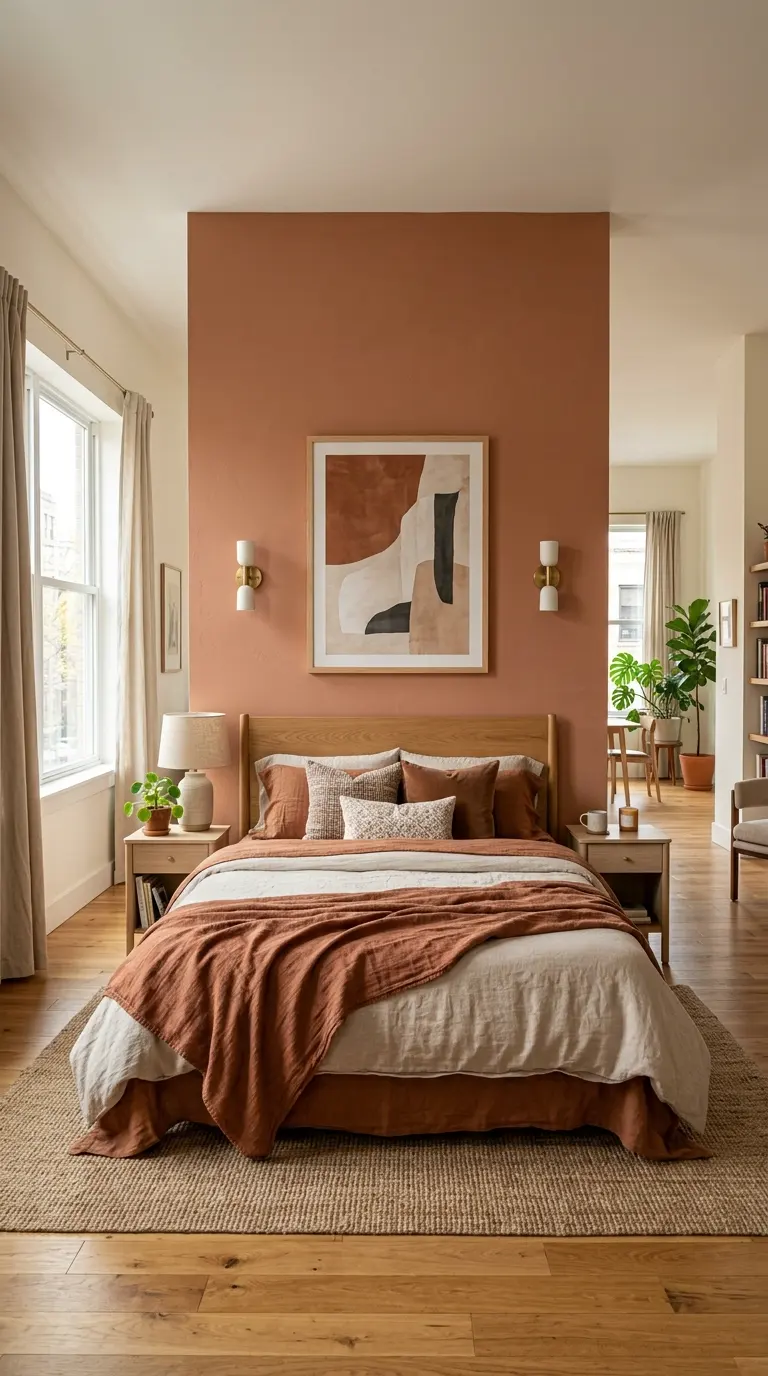
Choosing one wall within a specific zone, like behind the bed or behind the sofa, and giving it a different color or wallpaper treatment reinforces that area’s distinct identity within the open studio. This trick works because it draws the eye to a specific section of the room rather than treating the whole space uniformly. It pairs well with most of the other zoning strategies on this list.
Choose a treatment that complements the rest of the studio’s palette rather than competing with it. Limiting this trick to one wall per zone keeps the overall space from feeling overly busy. It is a finishing touch that ties a zoning strategy together visually.
Frequently Asked Questions
What is the easiest way to divide a studio apartment without walls?
Using rugs to define separate zones is one of the easiest and most affordable methods. Pairing this with furniture placement, like positioning a sofa back toward the bed, reinforces the separation even further.
Can lighting really help zone a studio apartment?
Yes, different lighting temperatures and fixture styles signal different functions within a space. A warm lamp in a reading nook feels distinct from a brighter desk lamp in a workspace, even without any physical barrier.
Is it better to use furniture or curtains to divide a studio?
Both work well depending on your needs. Furniture creates a more permanent, structural feel, while curtains offer flexibility to open or close the space as needed.
How do I create a home office in a studio without losing living space?
Tucking a small desk into an underused corner, paired with a dedicated lamp and shelf, creates an effective office zone without requiring a separate room. Folding or wall-mounted desks work especially well for this purpose.
Do I need to paint different colors to zone my studio?
No, color changes are optional and just one of many zoning tools. Rugs, lighting, and furniture placement can achieve similar results without any painting at all.
What is the best way to separate a sleeping area in a studio?
Positioning the bed behind the sofa, using a tall headboard, or hanging a curtain panel are all effective ways to create separation. The right choice depends on your layout and how much privacy you need.
Can plants really help define zones in a small apartment?
Yes, a cluster of plants placed at a transition point creates a natural, living boundary that softens the space between two zones. This works especially well in studios with good natural light.
Conclusion
Dividing a studio apartment into zones does not require construction, permission from a landlord, or a large budget. With smart furniture placement, layered lighting, and a few visual cues like rugs or color changes, you can create distinct areas that each feel purposeful and organized. The key is consistency and intention, not size.
Try combining two or three of these ideas rather than relying on just one, since layered strategies tend to work best in a small space. With the right approach, your studio can feel like several rooms working together instead of one undefined space.